Spiffy UV Parallax Effect With OpenGL
Aloha, OpenGL devs! 🏝 Here’s another tutorial! I’m going to show you a nifty trick that game developers have long employed to bring their sidescrollers to life. It’s something called the parallax effect. If you’d like a detailed explanation of it, there’s some decent information on Wikipedia. But basically, the parallax effect is the thing that happens when objects that are closer to you (in the foreground) move faster than objects that are farther away from you (in the background). The farther away an object is, the slower it will scroll as you’re moving past it.
Remember this level?
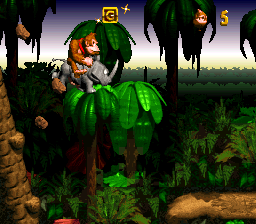
I always thought it was cool how the different layers of trees in the background scrolled by at different rates. It’s little flourishes like the parallax effect that make games greater than the sum of their pixels.
We’re going to achieve our parallax scrolling by combining two of the techniques we’ve learned about in previous tutorials: uv mapping and animation. For those of you who haven’t done any of the previous tutorials yet, here’s a list of all of them.
- Just Draw A Stupid Triangle With OpenGL
- Making A Dopey Circle Thing With OpenGL
- Just Interpolate Already With OpenGL
- Make A Stinking Sprite With OpenGL
- Distorting Sprites’ UV Mappings With OpenGL
- Silly Spiky Stars And Donuts With OpenGL
- Rounding All The Corners With OpenGL
- Dirt Basic Animation With OpenGL
- Windows 95 Tiling Wallpaper With OpenGL
But really, you should start with the first one. At the very least, you’ll need to have your project folder set up like we described there, and you’ll need the images subfolder that we added when we started working with sprites. Once you’ve got the earlier tutorials out of the way, this one will make a lot more sense.
What We’re Making
Here’s how our parallax scene will look when we’re done. Only animated.
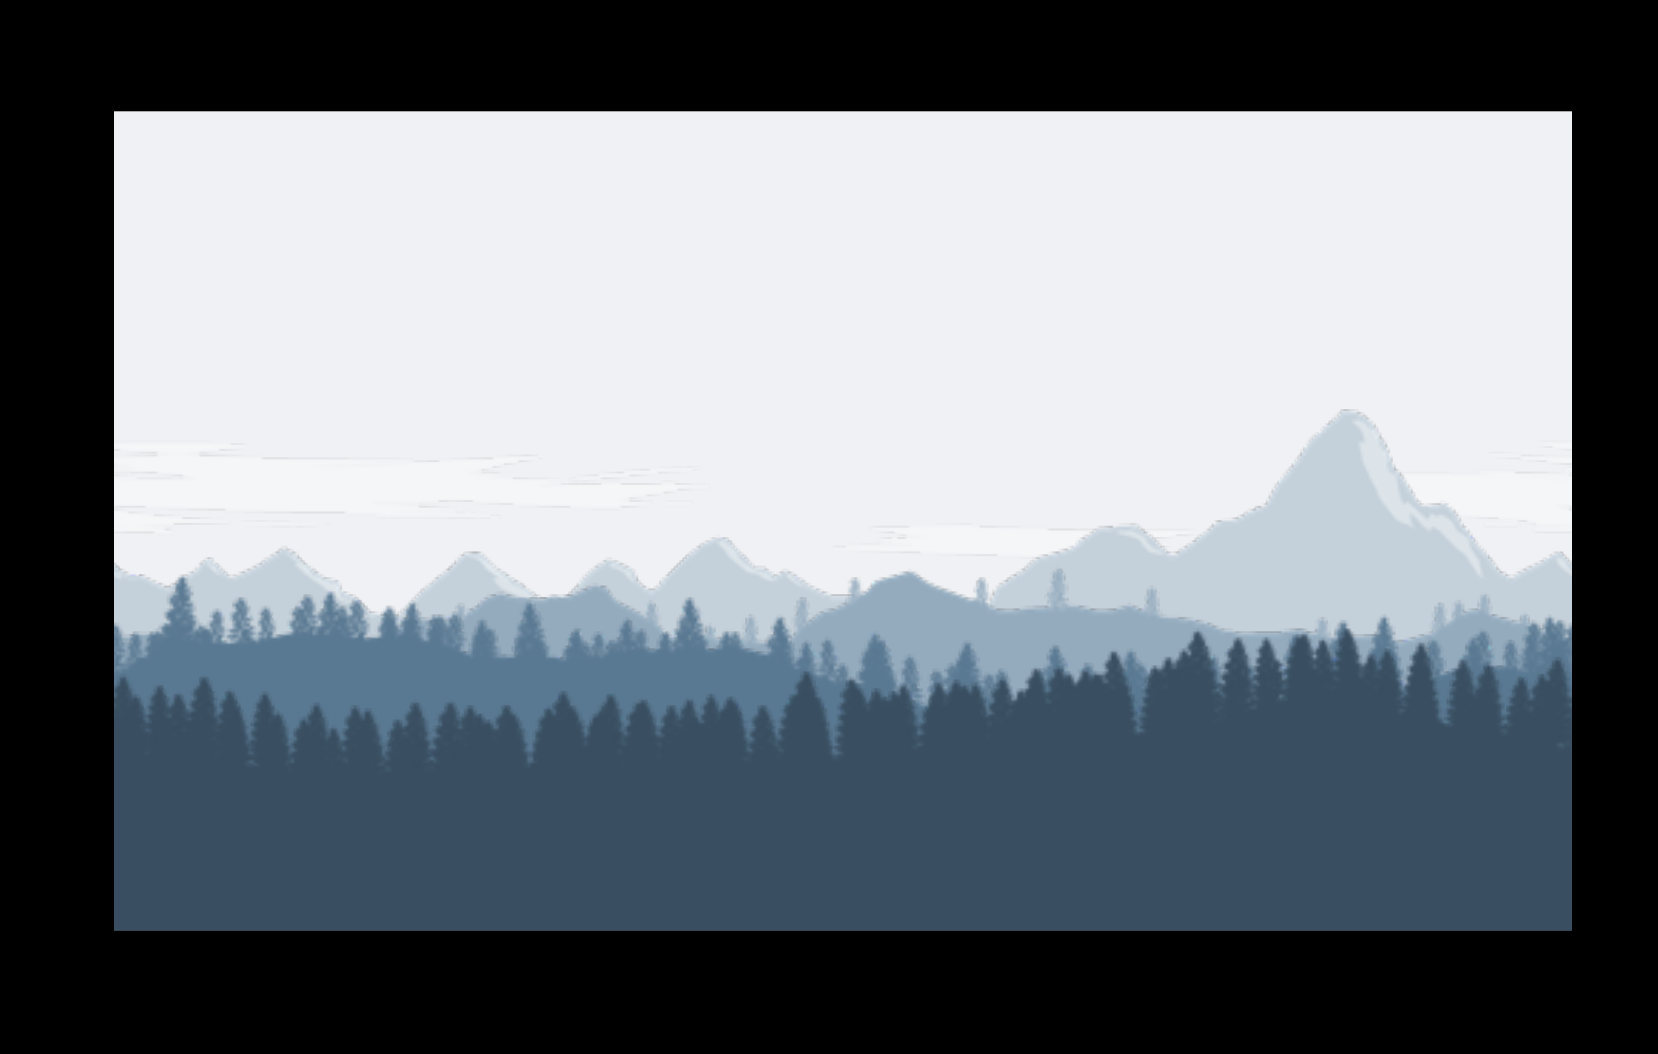
Slick. You can thank this random PWL person for drawing the original seamless mountain layer images that we’re using. I found them on OpenGameArt.org, which offers a modest selection of art with permissive licenses. That’s handy!
Word Of Warning
Before we get into the code, I have an important announcement to announce. There will be two versions of this tutorial. Why? Well… after I tested the original version (which we’re going to try first), I noticed that my web browser’s memory usage kept climbing. It seems like the animation is also pretty demanding in terms of processor power, as my laptop’s fans went into overdrive after only a minute or two of execution.
I’ll tell you more about the reasons for the inefficiencies in the next tutorial (where I’ve resolved them). For now all you need to know is that there’s a better way to accomplish uv scrolling with three.js. The original version is more consistent with the way we’ve built things in previous tutorials, however, so I think it makes a better teaching tool. We’ll stick with it for now.
Download This
Before we can get to the code, you’ll need to download the image files that we’ll be parallaxing. Click the link below to download the folder containing all six of them. You’ll need to unzip the PNGs into your images folder, in the same directory with poop.png and goat.jpg and so on.
Seamless Landscape Layers Archive
Like this:
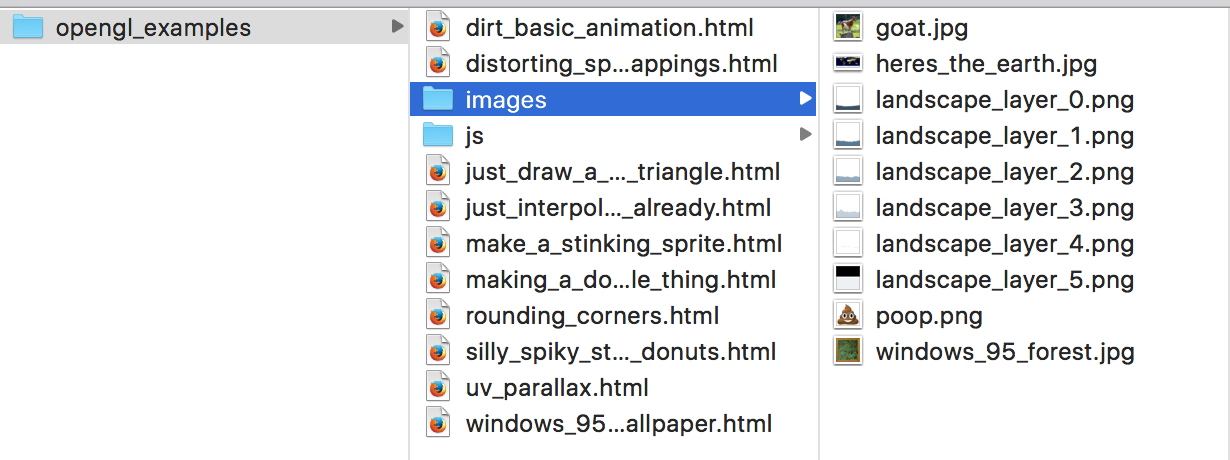
It should be noted that I’ve resized all of these images. Since this is just an example, I’m not overly concerned with preserving the assets’ quality. I’ve scaled them down from their original resolution so that they’re now 512 pixels square. That’s a power of two, which means that we can tile them using THREE.RepeatWrapping like we did last time. Of course the images weren’t square to begin with. They’re a lot wider than they are tall. So to make them square, I had to pad the top of each image with unused space. I looked at them in the image editor and figured out that only the bottom 288 pixels of each image are used after the resizing. That’s important because we’ll be using that number again in a bit. But enough talk. Let’s get to the code!
Code Code Code Code Code
Copy code. Paste code. Into file. This one’s called opengl_examples/uv_parallax.html.
<!DOCTYPE html>
<html lang="en">
  <head>
    <title>Spiffy UV Parallax Effect With OpenGL</title>
    <meta charset="utf-8">
    <meta name="viewport" content="width=device-width, user-scalable=no, minimum-scale=1.0, maximum-scale=1.0">
    <style>
      body {
        color: #ffffff;
        background-color: #000000;
        margin: 0px;
        overflow: hidden;
      }
    </style>
  </head>
  <body>

    <div id="container"></div>

    <script src="js/three.js"></script>
    <script src="js/Detector.js"></script>

    <script>

      var webGlSupported = Detector.webgl;
      if (!webGlSupported) {
        Detector.addGetWebGLMessage();
      }

      // 1
      const TEXTURE_RESOLUTION = 512;
      const TEXTURE_USED_HEIGHT = 288;

      const TEXTURE_USED_PROPORTION = TEXTURE_USED_HEIGHT / TEXTURE_RESOLUTION;

      const PARALLAX_RATES = [
        0.004,
        0.009,
        0.015,
        0.022,
        0.037,
        0.049
      ];

      const TEXTURES_COUNT = PARALLAX_RATES.length;

      var textureLoader = undefined;
      var textures = undefined;
      var loadedTexturesCount = undefined;

      var container = undefined;
      var camera = undefined;
      var scene = undefined;
      var renderer = undefined;

      var clock = undefined;

      var meshes = undefined;

      initializeTextureLoader();
      loadTextures();

      function initializeTextureLoader() {
        textureLoader = new THREE.TextureLoader();
      }

      // 2
      function loadTextures() {
        textures = [];
        loadedTexturesCount = 0;

        var onProgress = function(progressEvent) {};
        var onError = function(errorEvent) {console.error("Error loading texture", errorEvent);};

        for (var textureIndex = 0; textureIndex < TEXTURES_COUNT; textureIndex++) {
          var url = "images/landscape_layer_" + textureIndex + ".png";

          var texture = textureLoader.load(url, onTextureFinishedLoading, onProgress, onError);

          texture.wrapS = THREE.RepeatWrapping;
          texture.wrapT = THREE.RepeatWrapping;

          textures.push(texture);
        }
      }

      function onTextureFinishedLoading(texture) {
        loadedTexturesCount++;
        if (loadedTexturesCount == TEXTURES_COUNT) {
          resumeSetup();
        }
      }

      function resumeSetup() {
        initializeCamera();
        initializeScene();
        initializeRenderer();

        initializeClock();
        onTick();
      }

      function initializeScene() {
        scene = new THREE.Scene();

        meshes = [];

        for (var meshIndex = TEXTURES_COUNT - 1; meshIndex >= 0; meshIndex--) {
          var geometry = getRectangleGeometry();

          var texture = textures[meshIndex];
          var material = getMaterial(texture);

          var mesh = new THREE.Mesh(geometry, material);
          mesh.position.set(0.0, 0.0, 0.0);
          scene.add(mesh);

          meshes.push(mesh);
        }

      }

      // 3
      function getRectangleGeometry() {
        var geometry = new THREE.Geometry();

        var width = 320.0;
        var halfWidth = width * 0.5;

        var height = TEXTURE_USED_PROPORTION * width;
        var halfHeight = height * 0.5;

        var bottomLeftVertex = new THREE.Vector3(-halfWidth, -halfHeight, 0.0);
        var bottomRightVertex = new THREE.Vector3(halfWidth, -halfHeight, 0.0);
        var topLeftVertex = new THREE.Vector3(-halfWidth, halfHeight, 0.0);
        var topRightVertex = new THREE.Vector3(halfWidth, halfHeight, 0.0);

        geometry.vertices.push(bottomLeftVertex);
        geometry.vertices.push(bottomRightVertex);
        geometry.vertices.push(topLeftVertex);
        geometry.vertices.push(topRightVertex);

        geometry.faces.push(new THREE.Face3(0, 1, 2));
        geometry.faces.push(new THREE.Face3(1, 2, 3));

        geometry.bottomLeftUv = new THREE.Vector3(0.0, 0.0, 0.0);
        geometry.bottomRightUv = new THREE.Vector3(0.0, 0.0, 0.0);
        geometry.topLeftUv = new THREE.Vector3(0.0, TEXTURE_USED_PROPORTION, 0.0);
        geometry.topRightUv = new THREE.Vector3(0.0, TEXTURE_USED_PROPORTION, 0.0);

        geometry.faceVertexUvs[0] = getFaceUvLayer(
          geometry.bottomLeftUv,
          geometry.bottomRightUv,
          geometry.topLeftUv,
          geometry.topRightUv
        );

        return geometry;
      }

      function getFaceUvLayer(bottomLeftUv, bottomRightUv, topLeftUv, topRightUv) {

        var faceUvLayer = [
          [
            bottomLeftUv,
            bottomRightUv,
            topLeftUv
          ],
          [
            bottomRightUv,
            topLeftUv,
            topRightUv
          ]
        ];

        return faceUvLayer;
      }

      function getMaterial(texture) {
        return new THREE.MeshBasicMaterial({
          map: texture,
          side: THREE.DoubleSide,
          transparent: true
        });
      }

      function initializeCamera() {
        var aspectRatio = window.innerWidth / window.innerHeight;
        var screenWidth = undefined;
        var screenHeight = undefined;
        if (aspectRatio > 1.0) {
          screenWidth = 320.0 * aspectRatio;
          screenHeight = 320.0;
        } else {
          screenWidth = 320.0;
          screenHeight = 320.0 / aspectRatio;
        }

        var nearPlane = 1.0;
        var farPlane = 1000.0;
        camera = new THREE.OrthographicCamera(
          -0.5 * screenWidth,
          0.5 * screenWidth,
          0.5 * screenHeight,
          -0.5 * screenHeight,

          nearPlane,
          farPlane
        );

        var distanceFromScene = 500.0;
        camera.position.set(0.0, 0.0, distanceFromScene);
      }

      function initializeRenderer() {
        renderer = new THREE.WebGLRenderer();
        renderer.setPixelRatio(window.devicePixelRatio);
        renderer.setSize(window.innerWidth, window.innerHeight);

        container = document.getElementById("container");
        container.appendChild(renderer.domElement);
      }

      function renderScene() {
        renderer.render(scene, camera);
      }

      function initializeClock() {
        clock = new THREE.Clock();
      }

      // 4
      function updateUvs(elapsedTime) {

        for (var meshIndex = 0; meshIndex < TEXTURES_COUNT; meshIndex++) {
          var mesh = meshes[meshIndex];
          var parallaxRate = PARALLAX_RATES[meshIndex];

          var repititionsCount = 1.0;
          var uOffset = (parallaxRate * elapsedTime) % repititionsCount;

          var leftU = uOffset;
          var rightU = uOffset + repititionsCount;

          var geometry = mesh.geometry;

          geometry.bottomLeftUv.setX(leftU);
          geometry.topLeftUv.setX(leftU);

          geometry.bottomRightUv.setX(rightU);
          geometry.topRightUv.setX(rightU);

          geometry.elementsNeedUpdate = true;
        }

      }

      function onTick() {
        var elapsedTime = clock.getElapsedTime();

        updateUvs(elapsedTime);

        renderScene();
        window.requestAnimationFrame(onTick);
      }

    </script>

  </body>
</html>
There’s a lot of stuff happening, but if you glance over it quickly you’ll realize most of it is recycled from previous tutorials. We’re just using the old stuff in some new ways.
From The Top
The first part I wanted to point out to you is at the top, where we’re defining some constants.
// 1
const TEXTURE_RESOLUTION = 512;
const TEXTURE_USED_HEIGHT = 288;

const TEXTURE_USED_PROPORTION = TEXTURE_USED_HEIGHT / TEXTURE_RESOLUTION;

const PARALLAX_RATES = [
  0.004,
  0.009,
  0.015,
  0.022,
  0.037,
  0.049
];

const TEXTURES_COUNT = PARALLAX_RATES.length;
There’s that 288 number I told you would be important. We’re using it to calculate TEXTURE_USED_PROPORTION. Since uv coordinates work on a scale from 0.0 to 1.0, we’ll be able to plug in TEXTURE_USED_PROPORTION directly as a v coordinate. In this way, we can discard the unused portion of our textures but still make use of THREE.RepeatWrapping, since our texture’s full dimensions are still powers of two. Sneaky. But also cool.
The other thing to notice here is the PARALLAX_RATES array. Yes, these are the scrolling speeds of the six different layers we’ll be animating. Each frame, each layer will shift the u coordinates mapped to its four vertices over by an amount proportional its parallax rate.
I’m Doing It Wrong
Now… if you’re an experienced programmer, you probably already have a decent idea of how to approach writing this program floating around in your head. No doubt that approach involves defining a class from which our scrolling layers will be instantiated. And if you’ve looked over the program already you’re probably a little disappointed in me, as there are no class definitions to be found here (or in any of my tutorials’ code). Sorry! I hope I haven’t offended too many nerds out there.
I said something to this effect in a previous tutorial, but allow me to present my rationalization. Basically, I want to keep the focus of these tutorials on OpenGL, not on JavaScript. If I saw any possibility that I’d be reusing this code, then I’d definitely want to be building up a library of classes that all the tutorials share. The problem with that approach is that it makes it really hard to figure out which version of which class goes with which tutorial. I know it smells bad, but at least this way all of the code that goes with each tutorial is contained in its own file. It’s a compromise. I hope you’ll find it in your heart to forgive me someday.
Onward!
Let’s… change the subject. Textures! Before we only had to worry about one of them. But this time we have to load all six. I’m taking care of this in part // 2.
// 2
function loadTextures() {
  textures = [];
  loadedTexturesCount = 0;

  var onProgress = function(progressEvent) {};
  var onError = function(errorEvent) {console.error("Error loading texture", errorEvent);};

  for (var textureIndex = 0; textureIndex < TEXTURES_COUNT; textureIndex++) {
    var url = "images/landscape_layer_" + textureIndex + ".png";

    var texture = textureLoader.load(url, onTextureFinishedLoading, onProgress, onError);

    texture.wrapS = THREE.RepeatWrapping;
    texture.wrapT = THREE.RepeatWrapping;

    textures.push(texture);
  }
}

function onTextureFinishedLoading(texture) {
  loadedTexturesCount++;
  if (loadedTexturesCount == TEXTURES_COUNT) {
    resumeSetup();
  }
}
Don’t forget that three.js does its loading asynchronously. So basically loadTextures starts all six textures loading at the same time. After that, nothing else happens in the main program. It just sits there and waits while three.js is loading the textures behind the scenes. They’re small files, so they’ll usually finish almost instantly. But technically they could finish loading at any time and in any order. How will we know when all six of them are finished?
That’s where onTextureFinishedLoading comes in. We’ve passed it into our textureLoader’s load call, so it will run each time that one of the textures is ready. Each time it gets called, we increment the loadedTexturesCount and check to see if we’ve reached TEXTURES_COUNT–that is, if we’ve counted all the way up to 6 yet. If not, we keep waiting. But when we finally load the last of the textures, we call resumeSetup to finish initializing our scene.
Honestly it wouldn’t be a big deal if we hadn’t gone through all this trouble. We could have just finished initializing the scene and even started animating and rendering it, and nothing bad would’ve happened. If three.js doesn’t have all the data for a Texture when you try to render it, it simply skips that Mesh and moves on to the next one. Still, a partially loaded scene doesn’t look great. With games it’s always a good idea to preload as many resources as possible. You want to provide the smoothest possible experience for players by taking care of as much heavy computation as you reasonably can before they even start playing. Sure, we’re not writing a real game here, but we might as well get ourselves into that mindset, right?
Rectangles Upon Rectangles
I wanted to point out a few little things here in part // 3.
// 3
function getRectangleGeometry() {
  var geometry = new THREE.Geometry();

  var width = 320.0;
  var halfWidth = width * 0.5;

  var height = TEXTURE_USED_PROPORTION * width;
  var halfHeight = height * 0.5;

  var bottomLeftVertex = new THREE.Vector3(-halfWidth, -halfHeight, 0.0);
  var bottomRightVertex = new THREE.Vector3(halfWidth, -halfHeight, 0.0);
  var topLeftVertex = new THREE.Vector3(-halfWidth, halfHeight, 0.0);
  var topRightVertex = new THREE.Vector3(halfWidth, halfHeight, 0.0);

  geometry.vertices.push(bottomLeftVertex);
  geometry.vertices.push(bottomRightVertex);
  geometry.vertices.push(topLeftVertex);
  geometry.vertices.push(topRightVertex);

  geometry.faces.push(new THREE.Face3(0, 1, 2));
  geometry.faces.push(new THREE.Face3(1, 2, 3));

  geometry.bottomLeftUv = new THREE.Vector3(0.0, 0.0, 0.0);
  geometry.bottomRightUv = new THREE.Vector3(0.0, 0.0, 0.0);
  geometry.topLeftUv = new THREE.Vector3(0.0, TEXTURE_USED_PROPORTION, 0.0);
  geometry.topRightUv = new THREE.Vector3(0.0, TEXTURE_USED_PROPORTION, 0.0);

  geometry.faceVertexUvs[0] = getFaceUvLayer(
    geometry.bottomLeftUv,
    geometry.bottomRightUv,
    geometry.topLeftUv,
    geometry.topRightUv
  );

  return geometry;
}
One thing to take note of is the way we’re calculating the height of the meshes. I decided I wanted our scrolling layers to take up 320.0 units, which is the entire width of the guaranteed visible area. To make sure our image’s proportions don’t get stretched out or squashed down at all, I just multiplied this value by TEXTURE_USED_PROPORTION to figure out how many units tall the scrolling layers should be.
Another thing you’ll want to look at is the initial uv coordinates I’m providing. I left all four of the u coordinates at 0.0 for now because we’re going to update them before anything gets rendered. But the v coordinates are interesting. The bottom two are at 0.0, but the top two are at TEXTURE_USED_PROPORTION. That’s how we’re cutting out the blank area from the top of each texture. We’re mapping only the bottom (the part with the image in it) onto our meshes.
Again I must apologize, as I’m using a bit of a JavaScript hack here to make it easier to hold onto our uv coordinates. I’m saving a reference to each uv point in our geometry object. If I were doing things the right way, bottomLeftUv, bottomRightUv, topLeftUv, and topRightUv would all be properties of my parallaxing layer class. I just wanted to point that out. ☝️
Keep Scrolling, Scrolling, Scrolling…
Part // 4 is the real fun part.
// 4
function updateUvs(elapsedTime) {

  for (var meshIndex = 0; meshIndex < TEXTURES_COUNT; meshIndex++) {
    var mesh = meshes[meshIndex];
    var parallaxRate = PARALLAX_RATES[meshIndex];

    var repititionsCount = 1.0;
    var uOffset = (parallaxRate * elapsedTime) % repititionsCount;

    var leftU = uOffset;
    var rightU = uOffset + repititionsCount;

    var geometry = mesh.geometry;

    geometry.bottomLeftUv.setX(leftU);
    geometry.topLeftUv.setX(leftU);

    geometry.bottomRightUv.setX(rightU);
    geometry.topRightUv.setX(rightU);

    geometry.elementsNeedUpdate = true;
  }

}
I’m iterating through all the meshes. I pull each one’s parallaxRate out of the array we created at the beginning. And then I do some reasonably simple calculations to find leftU and rightU. The value of elapsedTime increases slightly each time updateUvs gets called, but the % (modulo) operator converts this constant upward climb into an endless cycle. We apply that cycle to our horizontal texture coordinates to produce our perpetual parade of clouds, mountains, and hillsides.
One bit of trickery that’s slightly obscured here is the way that our updates to the four corners of our texture get translated into the six points that make up the two triangles in each mesh’s faceUvLayer layer array. Well… since bottomLeftUv, topLeftUv, bottomRightUv, and topRightUv are objects, not primitives, JavaScript passes them around by reference. That means when we added these four Vector3 objects to our faceUvLayer array, they didn’t get copied. There’s still just one copy of each point. We actually stored references to each Vector3 in the faceUvLayer array… which means if we update the u coordinates in one place, we’re really updating the values everywhere they’re referenced simultaneously. Presto.
Cliffhanger
This one was pretty cool. I hope you enjoyed watching the landscape scroll by, and I also hope I didn’t melt your processor. Like I said, I’m going to show you how to make a much more efficient version in the next tutorial. This is the part where I usually tell you to meddle with the code to make sure you understand how it works. But honestly, it’s probably better to hold off for now. Try Part Two first, and then you’ll be able to conduct your experiments in a more forgiving environment. I’ll bet you can’t wait!
Get Yer Downloadables Here
Click here to run the finished product!
And here’s a link to a downloadable version of the source code: uv_parallax.html. Note that you’ll need to run it from inside the folder structure that we set up in the first tutorial, and you’ll also need to unzip the six images from the Seamless Landscape Layers Archive into your images subfolder.