Make A Stinking Sprite With OpenGL
Greetings, fellow OpenGL developers! I’m back to tell you even more about how you can build 2D games in OpenGL. This’ll be my fourth tutorial. Here are the other three I’ve written:
- Just Draw A Stupid Triangle With OpenGL
- Making A Dopey Circle Thing With OpenGL
- Just Interpolate Already With OpenGL
The technique I’m going to show you today probably won’t make much sense if you haven’t read the previous tutorials first. Also, you’ll need the folder structure that we created in the first tutorial if you want to run the code on your own machine.
What’s the plan for this tutorial? I’m glad you asked. Today we’ll be cooking up something uh… pungent.

That’s right. I’m going to show you how to make PIXELATED POOP.
Per Excreta Ad Astra
While rendering poop might not seem like the most relevant application for our modern graphics hardware–nor the most mature–I can assure you that it’s a perfectly effective demonstration of one of OpenGL’s most powerful features. Texture mapping is how we get raster images–the kind of pictures stored in JPEGs, PNGs, and other bitmap files–to appear in OpenGL renderings. It involves pinning points within a raster image to vertices on the triangles that make up a Mesh.

To start with, we’ll be mapping a single, rectangular image from a PNG file onto a single, rectangular Mesh–about the simplest mapping exercise possible. But once we’ve learned how this kind of mapping works, we’ll be able to apply it to much more ambitious endeavors. Just think! Poop mapped onto hexagons. Poop mapped onto cardinal splines. We can map poop onto anything! The sky’s the limit!
Some History
Before we get too carried away, let’s take a minute to talk about how we got here. Do you remember the early days of video games? Of course you do.
Back in the day, when video game engineers were first trying to figure out how to get pictures to show up on the clunky CRT monitors embedded in arcade cabinets, one particular solution quickly rose to prominence. Game graphics could be stored in tiny (often 8 pixels by 8 pixels) bitmap squares. Even that was a serious demand to place on hardware in those days. But with some ingenuity, hardware could be optimized to sip the visual information out of these squares in memory and efficiently spit it out at various positions across an empty display. As long as the engineers were careful not to overload the hardware with too many squares per frame, this approach allowed for reasonably smooth gameplay.
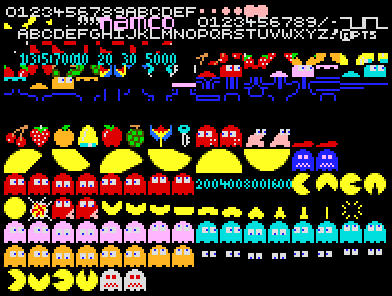
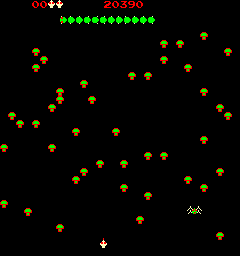
In the emerging paradigm, a name was coined for these glowing squares of delightful blockiness. Everything that appeared on the screen in early games–from the mushrooms, to the spiders, to the centipede segments, to the text, to the bullets, to the little… shooty thingy. They’re all sprites.
Sprites Are Dead. Long Live Sprites!
Of course, hardware has come a considerable way since those days. Now that we have billions of bytes of video memory at our disposal, as opposed to mere thousands, we’re no longer so preoccupied with saving space. Standardized graphics formats have expanded to fill the new frontier of cheap memory, and modern GPUs can blast unfathomable quantities of visual detail onto crisp displays at a slick 60 frames per second.

As hardware’s capabilities skyrocketed, the advantages of the traditional sprite-based approach began to melt away. Why limit your games to 8x8 squares when your graphics chip can handle 3D models? Sprites, at least as they existed on the hardware level, are no more. Nevertheless, the design patterns that engineers devised to facilitate building sprite-based games are alive and well. They’re no longer confined to squares; these days sprite usually refers to a rectangular image of any size that can be moved, rotated, or scaled about the screen. But basically every 2D game engine–and even many 3D game engines–provide some sort of Sprite system to streamline the transformation of standard image files into characters and power-ups.
Three.js is no exception. If we were designing an entire game with three.js, it would be stupid not to take advantage of the Sprite class. No sense reinventing the wheel. However, we’re not trying to build a game out of sprites just yet. We’re merely trying to understand how a sprite system might be implemented under OpenGL. Therefore, we we’ll be building our own poop sprite from scratch. Let’s get to work!
[Insert Joke About Code Smells]
You know the routine. I’ll paste all the code below. You can copy and paste it into your own file in the usual opengl_examples directory. We’ll call this one make_a_stinking_sprite.html.
![]()
Since we’re going to be loading our sprite’s texture from a PNG file, you’ll also need to save that file in a place that your program can access it. Create a new folder, also in your opengl_examples folder, and name it images. Then save a copy of poop.png in the images folder. (You can just click on the image to download it.)

Once you’ve done that, your file structure should look like this:
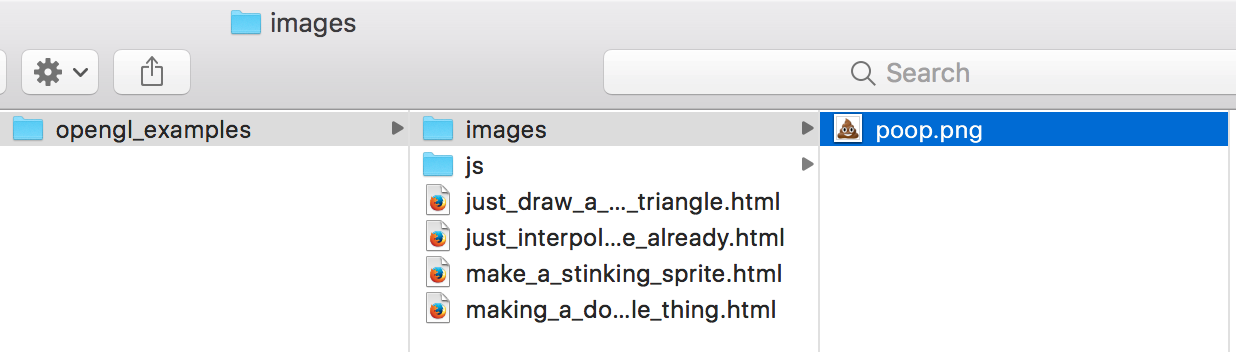
Anyway, here’s the code!
<!DOCTYPE html>
<html lang="en">
  <head>
    <title>Make A Stinking Sprite With OpenGL</title>
    <meta charset="utf-8">
    <meta name="viewport" content="width=device-width, user-scalable=no, minimum-scale=1.0, maximum-scale=1.0">
    <style>
      body {
        color: #ffffff;
        background-color: #000000;
        margin: 0px;
        overflow: hidden;
      }
    </style>
  </head>
  <body>

    <div id="container"></div>

    <script src="js/three.js"></script>
    <script src="js/Detector.js"></script>

    <script>

      var webGlSupported = Detector.webgl;
      if (!webGlSupported) {
        Detector.addGetWebGLMessage();
      }

      // 1
      var textureLoader = undefined;
      var texture = undefined;

      var container = undefined;
      var camera = undefined;
      var scene = undefined;
      var renderer = undefined;

      initializeTextureLoader();
      loadTexture();

      // 2
      function initializeTextureLoader() {
        textureLoader = new THREE.TextureLoader();
      }

      function loadTexture() {
        var url = "images/poop.png";
        var onFinishedLoading = resumeSetup;
        var onProgress = function(progressEvent) {};
        var onError = function(errorEvent) {console.error("Error loading texture", errorEvent);};

        texture = textureLoader.load(url, onFinishedLoading, onProgress, onError);
      }

      function resumeSetup() {
        initializeCamera();
        initializeScene();
        initializeRenderer();
        renderScene();
      }

      function initializeCamera() {
        var aspectRatio = window.innerWidth / window.innerHeight;
        var screenWidth = undefined;
        var screenHeight = undefined;
        if (aspectRatio > 1.0) {
          screenWidth = 320.0 * aspectRatio;
          screenHeight = 320.0;
        } else {
          screenWidth = 320.0;
          screenHeight = 320.0 / aspectRatio;
        }

        var nearPlane = 1.0;
        var farPlane = 1000.0;
        camera = new THREE.OrthographicCamera(
          -0.5 * screenWidth,
          0.5 * screenWidth,
          0.5 * screenHeight,
          -0.5 * screenHeight,

          nearPlane,
          farPlane
        );

        var distanceFromScene = 500.0;
        camera.position.set(0.0, 0.0, distanceFromScene);
      }

      // 3
      function initializeScene() {
        scene = new THREE.Scene();

        var material = getMaterial();

        var geometry = getSpriteGeometry();

        var mesh = new THREE.Mesh(geometry, material);
        mesh.position.set(0.0, 0.0, 0.0);
        scene.add(mesh);
      }

      // 4
      function getMaterial() {
        return new THREE.MeshBasicMaterial({
          map: texture,
          side: THREE.DoubleSide,
          transparent: true
        });
      }

      // 5
      function getSpriteGeometry() {
        var geometry = new THREE.Geometry();

        var bottomLeftVertex = new THREE.Vector3(-80.0, -80.0, 0.0);
        var bottomRightVertex = new THREE.Vector3(80.0, -80.0, 0.0);
        var topLeftVertex = new THREE.Vector3(-80.0, 80.0, 0.0);
        var topRightVertex = new THREE.Vector3(80.0, 80.0, 0.0);

        geometry.vertices.push(bottomLeftVertex);
        geometry.vertices.push(bottomRightVertex);
        geometry.vertices.push(topLeftVertex);
        geometry.vertices.push(topRightVertex);

        var faceUvLayer = getFaceUvLayer();
        geometry.faceVertexUvs[0] = faceUvLayer;

        geometry.faces.push(new THREE.Face3(0, 1, 2));
        geometry.faces.push(new THREE.Face3(1, 2, 3));

        return geometry;
      }

      // 6
      function getFaceUvLayer() {
        var bottomLeftUv = new THREE.Vector3(0.0, 0.0, 0.0);
        var bottomRightUv = new THREE.Vector3(1.0, 0.0, 0.0);
        var topLeftUv = new THREE.Vector3(0.0, 1.0, 0.0);
        var topRightUv = new THREE.Vector3(1.0, 1.0, 0.0);

        var faceUvLayer = [];

        faceUvLayer.push([
          bottomLeftUv,
          bottomRightUv,
          topLeftUv
        ]);

        faceUvLayer.push([
          bottomRightUv,
          topLeftUv,
          topRightUv
        ]);

        return faceUvLayer;
      }

      function initializeRenderer() {
        renderer = new THREE.WebGLRenderer();
        renderer.setPixelRatio(window.devicePixelRatio);
        renderer.setSize(window.innerWidth, window.innerHeight);

        container = document.getElementById("container");
        container.appendChild(renderer.domElement);
      }

      function renderScene() {
        renderer.render(scene, camera);
      }

    </script>

  </body>
</html>
Some Rearranging
I’m sure you’ll notice that I moved a few things around. But please don’t be scared off–I promise it’s nothing too complicated. Let’s start at the top with part // 1.
// 1
var textureLoader = undefined;
var texture = undefined;

var container = undefined;
var camera = undefined;
var scene = undefined;
var renderer = undefined;

initializeTextureLoader();
loadTexture();
We’re defining the usual global variables, but we’ve listed two new ones up here. textureLoader and texture. That’s appropriate, as we call initializeTextureLoader and loadTexture just below. But wait, isn’t that where we usually would initialize our camera and scene? And where’s the call to renderScene? Don’t worry–we’ll get to those. I’ll explain in a minute.
But First, Load Up That Texture

Get yer shovels ready! We’re about to get our hands dirty. Take a gander at part // 2.
// 2
function initializeTextureLoader() {
  textureLoader = new THREE.TextureLoader();
}

function loadTexture() {
  var url = "images/poop.png";
  var onFinishedLoading = resumeSetup;
  var onProgress = function(progressEvent) {};
  var onError = function(errorEvent) {console.error("Error loading texture", errorEvent);};

  texture = textureLoader.load(url, onFinishedLoading, onProgress, onError);
}

function resumeSetup() {
  initializeCamera();
  initializeScene();
  initializeRenderer();
  renderScene();
}
We’ve got three functions here. initializeTextureLoader is pretty straightforward. We’re simply assigning an instance of a three.js class to the textureLoader variable we just declared. Then we’ve got loadTexture, which predictably uses that textureLoader to load a file into the texture variable. And finally we’ve got resumeSetup…
Aha–so that’s where the rest of the initialization calls went. They’ve been moved into resumeSetup. But why are we resuming them? Did we ever stop the setup?
It turns out that three.js does its loading asynchronously. What does this mean, and why would they design it that way? Well, sometimes image files can get fairly large. If you’re downloading lots of images over the web with a slow connection, the download can take seconds or even minutes to complete. If your program were sitting there waiting for the entire download before proceeding, then your web browser could be unresponsive for an unacceptably long amount of time.

To keep your programs feeling responsive, three.js doesn’t allow you to hold up program execution in this way–what we’d call synchronous loading. Instead, the load method doesn’t wait for anything. It immediately returns an empty THREE.Texture object, which it will fill up with data from the download as it becomes available. That way your program can continue its execution without incurring any delay. You just can’t do anything with the Texture object until it finishes loading.
So how do you know when it’s finished loading? That’s what these lines are all about.
var onFinishedLoading = resumeSetup;
var onProgress = function(progressEvent) {};
var onError = function(errorEvent) {console.error("Error loading texture", errorEvent);};
The load method lets us specify three callback functions. If something goes wrong–like it can’t find the url we gave it–then it’ll call onError. For files that are large enough, onProgress gets called throughout the download with information about how much of the download remains. Since we’re just loading one tiny file, we don’t care about reporting the progress to the user. I’ve left the onProgress implementation empty to disregard progress events. And of course we have onFinishedLoading, which I’m simply routing to the resumeSetup function.
If you look back at part // 1, you’ll see that loadTexture is actually the last line that gets called from the main body of our program. We define all the functions after it, but no further statements get executed. That means that as soon as textureLoader.load returns its empty Texture object, the main program finishes executing. At that point we haven’t drawn anything to the screen yet, so the empty page will sit idly until our textureLoader finishes the download. It’s a small file, so it should be a very short wait. When the texture is ready, three.js will revive our program by calling resumeSetup. resumeSetup calls initializeCamera, which hasn’t changed since the previous tutorial. After that, it calls initializeScene, which brings us to part // 3.
Same Old Scene Setup
initializeScene itself looks mostly the same as it usually does.
// 3
function initializeScene() {
  scene = new THREE.Scene();

  var material = getMaterial();

  var geometry = getSpriteGeometry();

  var mesh = new THREE.Mesh(geometry, material);
  mesh.position.set(0.0, 0.0, 0.0);
  scene.add(mesh);
}
Your Material Is Poop
But let’s see what’s changed in getMaterial. Scroll down slightly to part // 4.
// 4
function getMaterial() {
  return new THREE.MeshBasicMaterial({
    map: texture,
    side: THREE.DoubleSide,
    transparent: true
  });
}
Before, the Material’s constructor is where we’d provide information about what color to paint our object. This time we want to paint it lots of different colors, and we want OpenGL to look up those colors in our texture object. Three.js uses the map property to specify a texture, so we’re hooking that up here.
The other addition here is the transparent flag. We’re setting this to tell OpenGL that, in addition to the usual red, green, and blue color channels, our image also contains a fourth channel to indicate the opacity value of each pixel. Graphics people generally refer to this opacity channel as the alpha channel. As far as I can tell, this is mostly a fancy phrase we’ve made up to be pompous and make non-graphics people feel dumb. Anyway, if we don’t tell OpenGL that our image has an alpha channel, then our poop’s fuzzy edges and transparent background won’t display correctly. And that would be a shame.
What Pairs Well With A Poop Material?
We’re also doing something different with our Geometry object. Here’s part // 5.
// 5
function getSpriteGeometry() {
  var geometry = new THREE.Geometry();

  var bottomLeftVertex = new THREE.Vector3(-80.0, -80.0, 0.0);
  var bottomRightVertex = new THREE.Vector3(80.0, -80.0, 0.0);
  var topLeftVertex = new THREE.Vector3(-80.0, 80.0, 0.0);
  var topRightVertex = new THREE.Vector3(80.0, 80.0, 0.0);

  geometry.vertices.push(bottomLeftVertex);
  geometry.vertices.push(bottomRightVertex);
  geometry.vertices.push(topLeftVertex);
  geometry.vertices.push(topRightVertex);

  var faceUvLayer = getFaceUvLayer();
  geometry.faceVertexUvs[0] = faceUvLayer;

  geometry.faces.push(new THREE.Face3(0, 1, 2));
  geometry.faces.push(new THREE.Face3(1, 2, 3));

  return geometry;
}
Okay. The way we’re plotting our vertices looks pretty standard. It’s a lot like what we did for the Green Triangle… except this time there’s a fourth point. It looks like we’re making a square with sides of 160.0 units and its center at the origin. Then we push those points onto the vertices array–nothing new there. At the bottom we’re also providing two Face3 objects. Each of them makes up half of the square, like this:
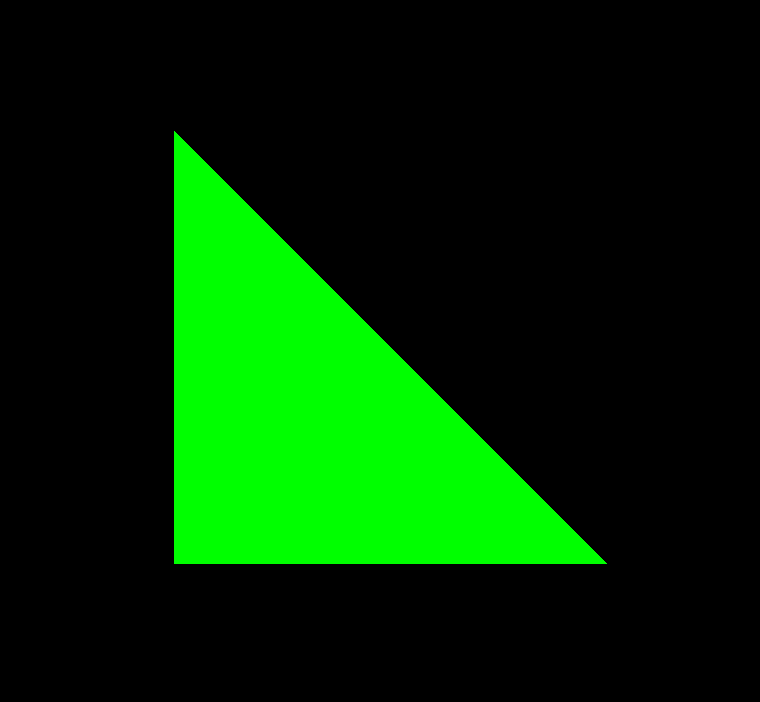
![]()
But I skipped over something. What’s going on with this faceUvLayer thing? I’m replacing the first element in an array with something I create in getFaceUvLayer. But before we go into what that something is, let’s talk about uv coordinates.
Maximum UV Protection

They may remind you of the tagline for an expensive sunblock, but in graphics, the letters u and v have special meaning. They’re a lot like x, y, and z, which we use to refer to coordinates in euclidean space. u and v refer to coordinates as well, but they’re coordinates within a 2D texture. Basically they’re like x and y coordinates on a texture, only we use different letters to avoid confusion.
Generally uv coordinates are set up to work on a scale from 0.0 to 1.0, where (0.0, 0.0) is the origin, and (1.0, 1.0) is the opposite corner of the texture. Here’s how our poop texture looks with the uv coordinate system marked over it.

Note that our poop PNG has an actual resolution of 128 by 128 pixels. So the point at the center of the texture (64 pixels over and 64 pixels up) is at about (0.5, 0.5) in uv coordinates. It’s important to understand, however, that uv coordinates work independently of an image’s actual resolution and aspect ratio. Our image could just as easily be 1024 pixels by 768 pixels… or 3 pixels by 999999 pixels. Regardless, its lower-left corner would still be at (0.0, 0.0), and its upper-right corner would still be at (1.0, 1.0).
Projecting Poop

In OpenGL, a sprite is really nothing more than a projection. We’re projecting–or mapping–one coordinate system onto another. We need to map our texture’s uv coordinates onto our geometry’s xy coordinates. And it turns out that’s not too complicated. As we saw above, we have two triangles that will make up our sprite, so there are a total of six vertices that we’ll need to map uv coordinates onto. Let’s look at part // 6.
// 6
function getFaceUvLayer() {
  var bottomLeftUv = new THREE.Vector3(0.0, 0.0, 0.0);
  var bottomRightUv = new THREE.Vector3(1.0, 0.0, 0.0);
  var topLeftUv = new THREE.Vector3(0.0, 1.0, 0.0);
  var topRightUv = new THREE.Vector3(1.0, 1.0, 0.0);

  var faceUvLayer = [];

  faceUvLayer.push([
    bottomLeftUv,
    bottomRightUv,
    topLeftUv
  ]);

  faceUvLayer.push([
    bottomRightUv,
    topLeftUv,
    topRightUv
  ]);

  return faceUvLayer;
}
First, I’m plotting four points that correspond to the four corners of our Texture’s uv coordinate system. Once again, three.js expects us to use Vector3 objects for these points (even though it’s a 2D coordinate system), and that’s why all the z values are 0.0. Then, I’m creating an array, which I’m calling faceUvLayer. After we return it, we’re going to place this array into our geometry’s faceVertexUvs array. Here’s what the three.js documentation says about that array:
Array of face UV layers, used for mapping textures onto the geometry. Each UV layer is an array of UVs matching the order and number of vertices in faces.
Honestly it was a little tough for me to unravel this myself. But after some trial and error, I think I have it figured out. Each geometry has a faceVertexUvs property, which is an array. The faceVertexUvs array can contain any number of face UV layers… which are also arrays. What do you put in a face UV layer array? You put in more arrays! Each of these bottommost arrays corresponds to a Face3 object in our geometry and contains three Vector3 objects. The three Vector3 objects are the uv coordinates to map onto the three corners of the corresponding triangle. Whew!

Sorry about all those different levels. It’s a lot easier to wrap your head around if you just look at the code rather than the English explanation. Normally I’d have sharp criticism for an engine design like this, but having tried to write one myself, I think it’s totally understandable how three.js got to this point. If your engine is only supposed to interact with OpenGL in a very limited way, then it’s easy enough to keep your data structures tidy and organized. But as soon as you try to add new features–to interface with OpenGL in a slightly larger set of the infinite possibilities that it allows–then your engine has to absorb the complexity somehow.
I’ll spare you the rest of my rant about engine design. I believe we were working on a way to map uv coordinates onto our two triangles. You’ll see there are two arrays that I’m pushing into faceUvLayer. Pay attention to the order of the points that they contain. The first one begins at the bottom-left uv, then runs over to the bottom-right, and finally connects up with the top-left. If you go back to where our Face3 objects are defined in getSpriteGeometry, you’ll see that we listed the first triangle’s vertices in the exact same order–0, 1, 2. On the diagram of our square, indices 0, 1, and 2 are also respectively the bottom-left, bottom-right, and top-left corners. And our second triangle has vertex indices 1, 2, and 3… the bottom-right, top-left, and top-right corners of our square. Sure enough, the second array of uv coordinates that we push into faceUvLayer contains bottomRightUv, topLeftUv, and topRightUv. They all match up!

The faceUvLayer array that we return overwrites the contents of the first element in our geometry’s faceVertexUvs array. It seems a little odd to me too, but that’s how three.js expects us to supply uv coordinates. When three.js passes our Mesh to OpenGL, it will store the the uv coordinate values that we’ve specified in the matching triangle vertices, alongside the vertices’ location coordinate values. It’s very similar to the way that we stored color values in individual vertices in the previous tutorial.
That’s all the code that we needed to change to get our beaming mound of poo to appear. Go ahead and drop the HTML file into your browser. Smells like success! Congratulations–we’ve just projected a Texture onto a Mesh. Hopefully this is the first of many texture mappings we’ll be doing.
Flushing Farewell (For Now)
There’s plenty more to be said about texture mapping, but we’ve already accomplished a lot in this tutorial. I’ll cover the rest of the major points in a Part II that hopefully will be wrapped up soon. But I’m sure you’re already beginning to imagine the sorts of effects that texture mapping could allow us to create. Can’t wait to demonstrate a few of them for ya!
The Downloadables
Click here to run the finished product!
And here’s a link to a downloadable version of the source code: make_a_stinking_sprite.html. Note that you’ll need to run it from inside the folder structure that we set up in the first tutorial, and you’ll also need the image we’re using in its own images subfolder.