Distorting Sprites' UV Mappings With OpenGL
Yo, yo! Welcome back. This is the second part of the tutorial I started on making a stinking sprite with OpenGL. It’s the latest in my series of tutorials on how OpenGL works in 2D games. Here are the other ones I’ve written so far:
- Just Draw A Stupid Triangle With OpenGL
- Making A Dopey Circle Thing With OpenGL
- Just Interpolate Already With OpenGL
- Make A Stinking Sprite With OpenGL
If you haven’t read them yet, you should go back and do that before diving in here. In order to get anything to run on your own computer, you’ll need to have a project folder set up like we described in the very first tutorial.
Your Mission, Should You Choose To Accept It
Today we’ll be doing some more work with sprites and texture mapping. Specifically, we’re going to see what happens when you mess around with the UV mappings that we learned about in the first part of this tutorial. That’s right, we’re going to deface some perfectly good sprites. Vandalism is fun, and in this case it will help us learn how to harness UV mapping for some rad special effects.
UV mapping is a particularly powerful feature of OpenGL whose utility is overlooked all too often. Modern 2D game engines make it relatively simple to dive into game development–which is awesome–but such simplicity tends to come at the expense of access to the lower-level interfaces that OpenGL provides. And truthfully, UV mapping isn’t even that complex. It just happens to be slightly more involved than some other elements of OpenGL. The good news for you is that mastering effects like UV mapping can really make your game stand out in the midst of a sea of lookalikes that confine themselves to the most convenient ingredients.
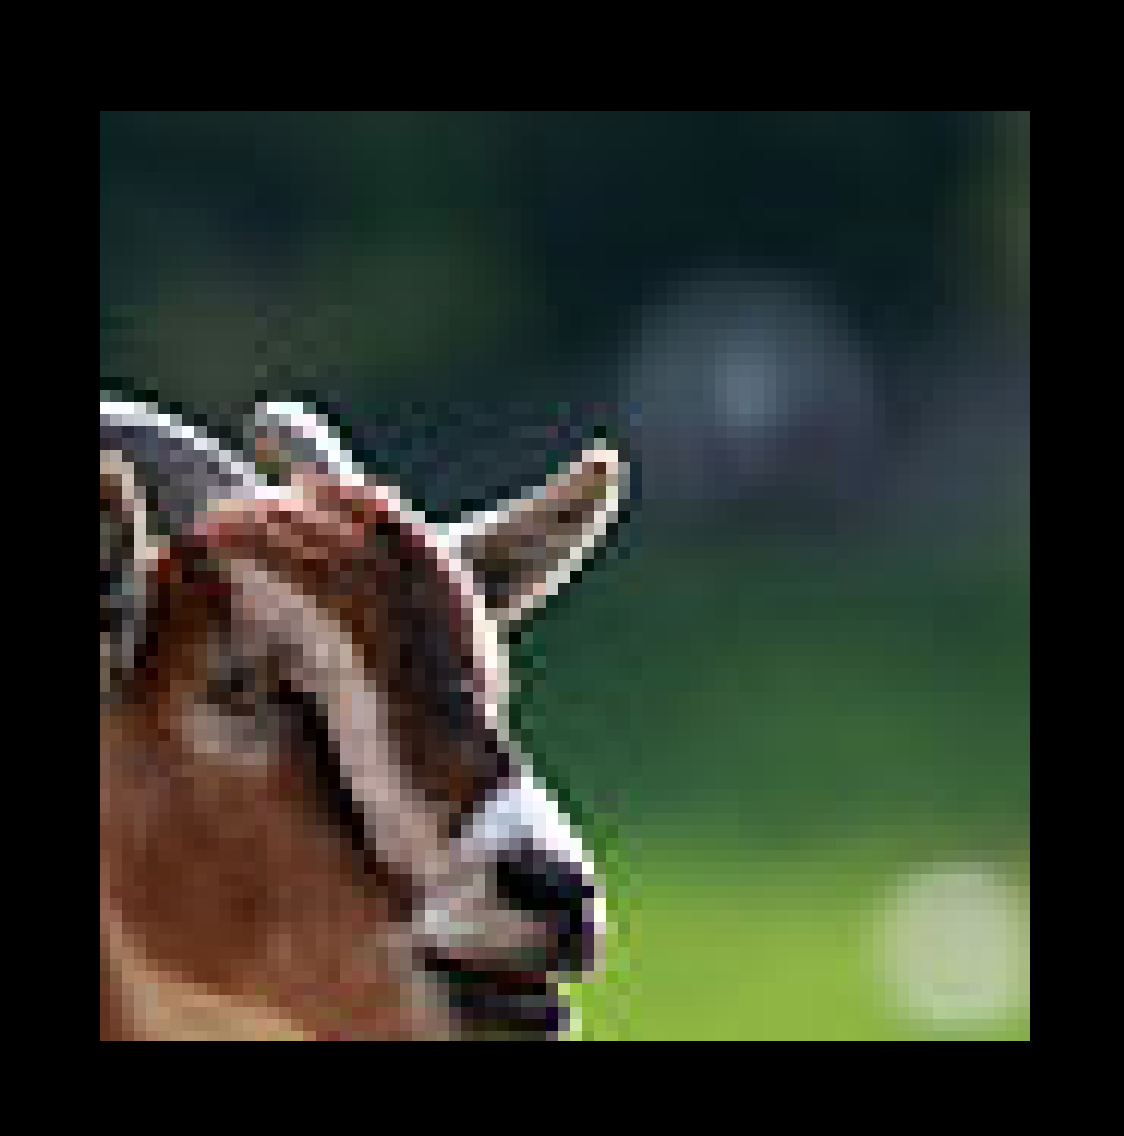
But First, Goats
Before we write any code, it’s important to mention goats. Goats are odd. That is all.
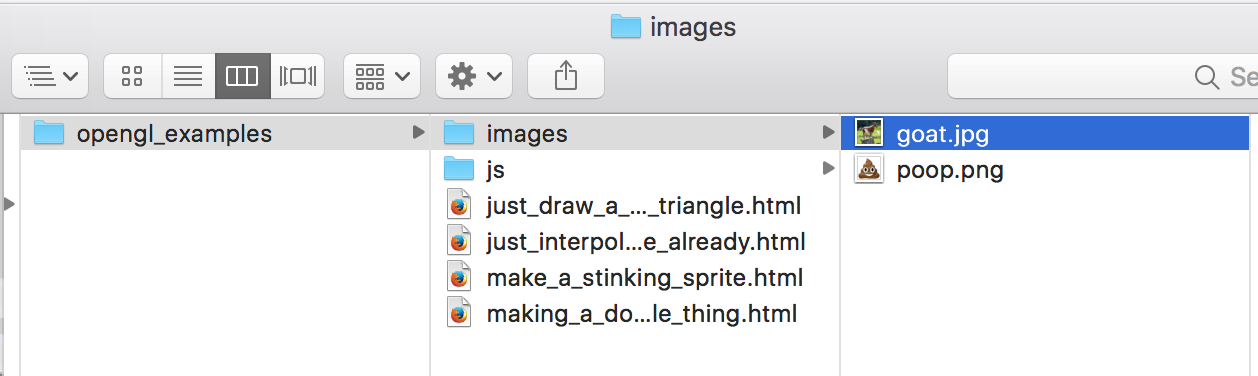
Oh, also, we’ll be using an image of a goat for the texture that we’ll be distorting today. Please click on the following image to download it.

And save it in the images folder that we created for the previous tutorial, alongside poop.png. Your folder structure will look like this:
Neat. Code Time!
Yes. Here’s the code! Save it in a file in opengl_examples called distorting_sprites_uv_mappings.html. Then you can drop it right into your browser window, and it should run without any changes.
<!DOCTYPE html>
<html lang="en">
<head>
<title>Distorting Sprites' UV Mappings With OpenGL</title>
<meta charset="utf-8">
<meta name="viewport" content="width=device-width, user-scalable=no, minimum-scale=1.0, maximum-scale=1.0">
<style>
body {
color: #ffffff;
background-color: #000000;
margin: 0px;
overflow: hidden;
}
</style>
</head>
<body>
<div id="container"></div>
<script src="js/three.js"></script>
<script src="js/Detector.js"></script>
<script>
var webGlSupported = Detector.webgl;
if (!webGlSupported) {
Detector.addGetWebGLMessage();
}
// 7
const BOTTOM_LEFT_UV = new THREE.Vector3(0.0, 0.0, 0.0);
const BOTTOM_RIGHT_UV = new THREE.Vector3(1.0, 0.0, 0.0);
const TOP_LEFT_UV = new THREE.Vector3(0.0, 1.0, 0.0);
const TOP_RIGHT_UV = new THREE.Vector3(1.0, 1.0, 0.0);
// 1
var textureLoader = undefined;
var texture = undefined;
var material = undefined;
var container = undefined;
var camera = undefined;
var scene = undefined;
var renderer = undefined;
initializeTextureLoader();
loadTexture();
function initializeTextureLoader() {
textureLoader = new THREE.TextureLoader();
}
// 2
function loadTexture() {
var url = "images/goat.jpg";
var onFinishedLoading = resumeSetup;
var onProgress = function(progressEvent) {};
var onError = function(errorEvent) {console.error("Error loading texture", errorEvent);};
texture = textureLoader.load(url, onFinishedLoading, onProgress, onError);
}
// 3
function resumeSetup() {
initializeCamera();
initializeMaterial();
initializeScene();
initializeRenderer();
renderScene();
}
// 4
function initializeMaterial() {
material = new THREE.MeshBasicMaterial({
map: texture,
side: THREE.DoubleSide
});
}
// 5
function initializeScene() {
scene = new THREE.Scene();
addSpriteToScene(
getFaceUvLayerOriginal(),
-80.0, 80.0
);
addSpriteToScene(
getFaceUvLayerFlippedX(),
0.0, 80.0
);
addSpriteToScene(
getFaceUvLayerFlippedY(),
80.0, 80.0
);
addSpriteToScene(
getFaceUvLayerRotatedClockwise(),
-80.0, 0.0
);
addSpriteToScene(
getFaceUvLayerZoomedCenter(),
0.0, 0.0
);
addSpriteToScene(
getFaceUvLayerZoomedCorner(),
80.0, 0.0
);
addSpriteToScene(
getFaceUvLayerElongated(),
-80.0, -80.0
);
addSpriteToScene(
getFaceUvLayerSpaghettification(),
0.0, -80.0
);
addSpriteToScene(
getFaceUvLayerSlanted(),
80.0, -80.0
);
}
// 6
function addSpriteToScene(faceUvLayer, x, y) {
var geometry = getSpriteGeometry();
geometry.faceVertexUvs[0] = faceUvLayer;
var mesh = new THREE.Mesh(geometry, material);
mesh.position.set(x, y, 0.0);
scene.add(mesh);
}
function getSpriteGeometry() {
var geometry = new THREE.Geometry();
var bottomLeftVertex = new THREE.Vector3(-30.0, -30.0, 0.0);
var bottomRightVertex = new THREE.Vector3(30.0, -30.0, 0.0);
var topLeftVertex = new THREE.Vector3(-30.0, 30.0, 0.0);
var topRightVertex = new THREE.Vector3(30.0, 30.0, 0.0);
geometry.vertices.push(bottomLeftVertex);
geometry.vertices.push(bottomRightVertex);
geometry.vertices.push(topLeftVertex);
geometry.vertices.push(topRightVertex);
geometry.faces.push(new THREE.Face3(0, 1, 2));
geometry.faces.push(new THREE.Face3(1, 2, 3));
return geometry;
}
// 8
function getFaceUvLayerOriginal() {
return [
[BOTTOM_LEFT_UV, BOTTOM_RIGHT_UV, TOP_LEFT_UV],
[BOTTOM_RIGHT_UV, TOP_LEFT_UV, TOP_RIGHT_UV]
];
}
function getFaceUvLayerFlippedX() {
return [
[BOTTOM_RIGHT_UV, BOTTOM_LEFT_UV, TOP_RIGHT_UV],
[BOTTOM_LEFT_UV, TOP_RIGHT_UV, TOP_LEFT_UV]
];
}
function getFaceUvLayerFlippedY() {
return [
[TOP_LEFT_UV, TOP_RIGHT_UV, BOTTOM_LEFT_UV],
[TOP_RIGHT_UV, BOTTOM_LEFT_UV, BOTTOM_RIGHT_UV]
];
}
function getFaceUvLayerRotatedClockwise() {
return [
[BOTTOM_RIGHT_UV, TOP_RIGHT_UV, BOTTOM_LEFT_UV],
[TOP_RIGHT_UV, BOTTOM_LEFT_UV, TOP_LEFT_UV]
];
}
function getFaceUvLayerZoomedCenter() {
return [
[
new THREE.Vector3(0.25, 0.25, 0.0),
new THREE.Vector3(0.75, 0.25, 0.0),
new THREE.Vector3(0.25, 0.75, 0.0),
],
[
new THREE.Vector3(0.75, 0.25, 0.0),
new THREE.Vector3(0.25, 0.75, 0.0),
new THREE.Vector3(0.75, 0.75, 0.0)
]
];
}
function getFaceUvLayerZoomedCorner() {
return [
[
new THREE.Vector3(0.7, 0.7, 0.0),
new THREE.Vector3(1.0, 0.7, 0.0),
new THREE.Vector3(0.7, 1.0, 0.0),
],
[
new THREE.Vector3(1.0, 0.7, 0.0),
new THREE.Vector3(0.7, 1.0, 0.0),
new THREE.Vector3(1.0, 1.0, 0.0)
]
];
}
function getFaceUvLayerElongated() {
return [
[
new THREE.Vector3(0.35, 0.0, 0.0),
new THREE.Vector3(0.65, 0.0, 0.0),
new THREE.Vector3(0.35, 1.0, 0.0),
],
[
new THREE.Vector3(0.65, 0.0, 0.0),
new THREE.Vector3(0.35, 1.0, 0.0),
new THREE.Vector3(0.65, 1.0, 0.0)
]
];
}
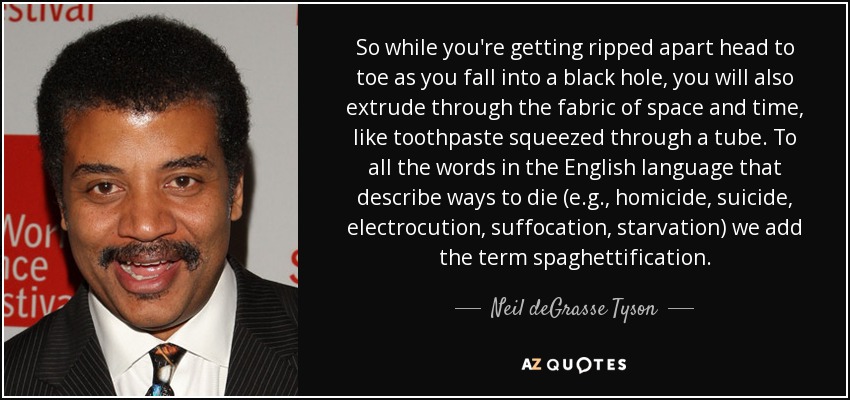
function getFaceUvLayerSpaghettification() {
return [
[
new THREE.Vector3(0.5, 0.0, 0.0),
new THREE.Vector3(0.5, 0.0, 0.0),
new THREE.Vector3(0.5, 1.0, 0.0),
],
[
new THREE.Vector3(0.5, 0.0, 0.0),
new THREE.Vector3(0.5, 1.0, 0.0),
new THREE.Vector3(0.5, 1.0, 0.0)
]
];
}
function getFaceUvLayerSlanted() {
return [
[
new THREE.Vector3(0.0, 0.35, 0.0),
new THREE.Vector3(1.0, 0.0, 0.0),
new THREE.Vector3(0.0, 1.0, 0.0),
],
[
new THREE.Vector3(1.0, 0.0, 0.0),
new THREE.Vector3(0.0, 1.0, 0.0),
new THREE.Vector3(1.0, 0.65, 0.0)
]
];
}
function initializeCamera() {
var aspectRatio = window.innerWidth / window.innerHeight;
var screenWidth = undefined;
var screenHeight = undefined;
if (aspectRatio > 1.0) {
screenWidth = 320.0 * aspectRatio;
screenHeight = 320.0;
} else {
screenWidth = 320.0;
screenHeight = 320.0 / aspectRatio;
}
var nearPlane = 1.0;
var farPlane = 1000.0;
camera = new THREE.OrthographicCamera(
-0.5 * screenWidth,
0.5 * screenWidth,
0.5 * screenHeight,
-0.5 * screenHeight,
nearPlane,
farPlane
);
var distanceFromScene = 500.0;
camera.position.set(0.0, 0.0, distanceFromScene);
}
function initializeRenderer() {
renderer = new THREE.WebGLRenderer();
renderer.setPixelRatio(window.devicePixelRatio);
renderer.setSize(window.innerWidth, window.innerHeight);
container = document.getElementById("container");
container.appendChild(renderer.domElement);
}
function renderScene() {
renderer.render(scene, camera);
}
</script>
</body>
</html>
Nice. Let’s talk about what it all means.
Excuses And Hypocrisy
Starting with part // 1, you can see that we’ve added yet another global variable to our main program.
// 1
var textureLoader = undefined;
var texture = undefined;

var material = undefined;

var container = undefined;
var camera = undefined;
var scene = undefined;
var renderer = undefined;

initializeTextureLoader();
loadTexture();
In the real world, I’d recommended using global variables more sparingly. Even though it’s a little more work up front to pass variables from function to function as parameters, it tends to make your code easier to refactor, which saves you (and the other people who have to read your code) tons of time in the long run. There are plenty of other benefits to minimizing the scope of your variables, but we’re beginning to stray from the scope of this tutorial. Suffice it to say, I’ve opted for global variables in these tutorials primarily for brevity’s sake. I’m afraid the extra wiring a more maintainable design would entail might distract from my main focus: OpenGL techniques. The same goes for several other unsanitary shortcuts I’ve taken but generally don’t endorse: keeping all the code in the same file, avoiding classes, and inventing my own solutions rather than reusing existing libraries, to name just a few.
With my overly-defensive disavowal of responsibility out of the way, let’s get back to the matter at hand. Right. I added the material variable because I want to share the same Material among the nine sprites we’re about to create. That’s all that’s about.
Don’t Forget About Goats!
Part // 2 is almost exactly the same as in the last tutorial. The only reason I’m calling your attention to it is so that you’ll note that I’ve updated the path to the image file that we’re using. We’re no longer using poop.png. Today we’re using goat.jpg!
// 2
function loadTexture() {
  var url = "images/goat.jpg";
Deactivate Cloaking Device
Also, I’ve added a call to initializeMaterial in part // 3.
// 3
function resumeSetup() {
  initializeCamera();
  initializeMaterial();
  initializeScene();
  initializeRenderer();
  renderScene();
}
…Which brings up the small change right below in part // 4.
// 4
function initializeMaterial() {
  material = new THREE.MeshBasicMaterial({
    map: texture,
    side: THREE.DoubleSide
  });
}
In the last tutorial, we included the transparent flag in our Material’s constructor. That’s because we were using a PNG with a transparent background. This time we’re using a JPG image as the source for our Texture. The JPG format doesn’t even allow you to include a transparency channel, so we have to tell OpenGL not to try to render with one. That’s why I took the transparent flag out.
Serious Business

Stay in your seat! We’re about to get to the serious part. Scroll right below to part // 5.
// 5
function initializeScene() {
  scene = new THREE.Scene();

  addSpriteToScene(
    getFaceUvLayerOriginal(),
    -80.0, 80.0
  );

  // ...
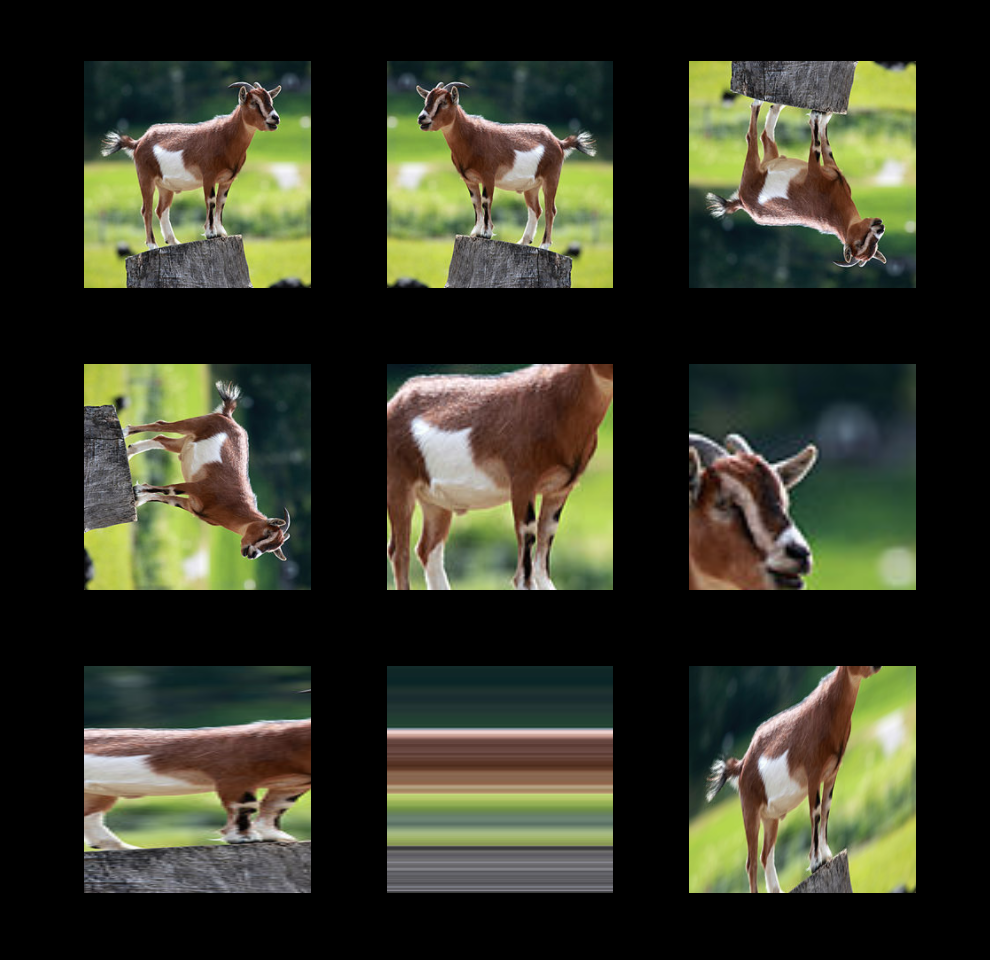
This time our scene setup seems to be split between two different functions. initializeScene creates the actual Scene object, but then it calls addSpriteToScene nine times with various sets of arguments. The nine calls are for the 3x3 grid of goats we’re assembling. Let’s see what happens in addSpriteToScene itself. The implementation is right below again in part // 6.
// 6
function addSpriteToScene(faceUvLayer, x, y) {
  var geometry = getSpriteGeometry();
  geometry.faceVertexUvs[0] = faceUvLayer;

  var mesh = new THREE.Mesh(geometry, material);

  mesh.position.set(x, y, 0.0);

  scene.add(mesh);
}
Okay. So each time we call addSpriteToScene, we’re creating a new Geometry object and assigning it the UV mapping that we pass in. Next we throw that Geometry into a Mesh that pairs it with the material we initialized earlier. Finally, we set the our new mesh/sprite’s position to the coordinates we’ve provided and add it to the scene. The whole process is really the same as how we built our sprite in the previous tutorial–we’ve just moved as much as we can into its own function to avoid repeating code for each sprite we add.
Coordinate Your Coordinates
We’ve finally arrived at the fun part. First, we’re going to set up some constant values to reference. I put them way back up near the top of the code in part // 7.
// 7
const BOTTOM_LEFT_UV = new THREE.Vector3(0.0, 0.0, 0.0);
const BOTTOM_RIGHT_UV = new THREE.Vector3(1.0, 0.0, 0.0);
const TOP_LEFT_UV = new THREE.Vector3(0.0, 1.0, 0.0);
const TOP_RIGHT_UV = new THREE.Vector3(1.0, 1.0, 0.0);
As you can see, they’re Vector3s that represent the four corners of a texture’s uv coordinate system. We’ll use them way back down at part // 8.
// 8
function getFaceUvLayerOriginal() {
  return [
    [BOTTOM_LEFT_UV, BOTTOM_RIGHT_UV, TOP_LEFT_UV],
    [BOTTOM_RIGHT_UV, TOP_LEFT_UV, TOP_RIGHT_UV]
  ];
}

// ...
Aha! There are nine functions here that all return arrays–the “face UV layers” that three.js uses. All we’re doing in each function is providing uv coordinates for the six vertices of the two triangles that make up each sprite. I could spend a while explaining every detail of the nine different mappings, but it’s probably more worthwhile for you to investigate them on your own. Try altering individual values and then refreshing your browser. You should quickly get a sense of how the various effects are being achieved.
Homework
When you tire of random discombobulations, let’s see if we can figure out how to produce some more coherent results. Try writing your own face UV layer function, and then reassign one of the sprites on the grid to use it instead. Did you notice how I shifted each corner mapping over one in getFaceUvLayerRotatedClockwise? See if you can make a CounterClockwise version. I’ve zoomed into the top-right corner in getFaceUvLayerZoomedCorner. Can you write a function that focuses on the bottom-left? And what about getFaceUvLayerSlanted? Perhaps you can make an alternate version with a steeper slant, or one that slants in the opposite direction. 🤔
Pixel Perfect
I’m afraid I must apologize to any artists or design-oriented people who may have been reading the last two tutorials. All of the sprites we’ve made so far–even those that we haven’t magnified at all–they’re all horrendously pixelated. This is the kind of detail that developers are notorious for overlooking. But in my humble opinion, such negligence is inexcusable… and frankly kind of pathetic. Attention to detail isn’t just about getting the design team off our backs. On the contrary, it’s the key ingredient that separates a clunky game from an engrossing game. Developers, stop making excuses for yourselves. You don’t have to go to art school to recognize shoddy workmanship.
I’ll have to try not to hurt myself as I’m climbing down from this soapbox, but we really should get back to the original discussion. Oh, yes. All our sprites are pixelated. Why? It’s because the images we’re loading our textures from are too small. goat.jpg is 256x256, and poop.png was only 128x128. However, by the time we stretch those images out across a sprite and project that sprite into our scene’s coordinate system, we end up with a surface that is considerably larger in terms of physical pixels. To fill in those extra pixels, OpenGL resorts to a technique that we’ve already touched on: interpolation.
Interpolate All The Things
How does interpolation work when we’re talking about textures? That depends on what settings we’ve given to OpenGL. OpenGL gives us a few built-in options that it can use to determine what color to paint pixels whey they don’t align perfectly with pixels from the source texture (also known as texels). In three.js, we select these options by setting the magFilter and minFilter properties on our Texture object. The minification filter is the method OpenGL will use when it needs to scale the source texture down to fit into a smaller projection. But in the case of this tutorial, we’re mainly doing the opposite–we’re scaling the source texture up to stretch out over a larger projection. As such, we’ll deal with the magFilter (magnification filter) property.
By default, each Texture’s magFilter property is set to THREE.LinearFilter. To understand what exactly OpenGL is doing when it uses linear interpolation to scale images, I highly recommend this video explanation by a friendly nerd with a British accent. If you look closely at any of the sprites we’ve created so far–particularly the ones where we’ve zoomed in–you’ll see the effects of this type of scaling. The colors blend smoothly into one another, and that’s usually the kind of effect we want in games.
But not always. Let’s see what happens when we try using THREE.NearestNeighbor instead. Go way back up to loadTexture in part // 2. At the very bottom of the function, right after we create our texture object, add the following line.
texture.magFilter = THREE.NearestFilter;
Now try refreshing, and look closely at the difference.
Interesting. The nearest neighbor method of interpolation produces a sharp, blocky quality. Like I said, it’s generally not what we want in games. Except when it is. And in those situations, you’ll be glad you know how to turn off the fuzziness.
Mission Accomplished

Nice work! We’ve unlocked a significant achievement today. With a solid understanding of uv coordinates, we’re ready to work with graphics on a level many game developers never bother to reach. We now know how sprite systems work behind the scenes, and it’s not hard to see from here how UV mapping could be applied to produce some pretty flashy visuals. I’m already planning out some devious designs for future UV-fueled tutorials. Mwa-ha-ha!
Down With Downloadables
Click here to run the finished product!
And here’s a link to a downloadable version of the source code: distorting_sprites_uv_mappings.html. Note that you’ll need to run it from inside the folder structure that we set up in the first tutorial, and you’ll also need the image we’re using in its own images subfolder.