Just Interpolate Already With OpenGL
Hi, hi! Here I am again with my third tutorial on 2D graphics using OpenGL. If you haven’t read the first two, you should check them out first:
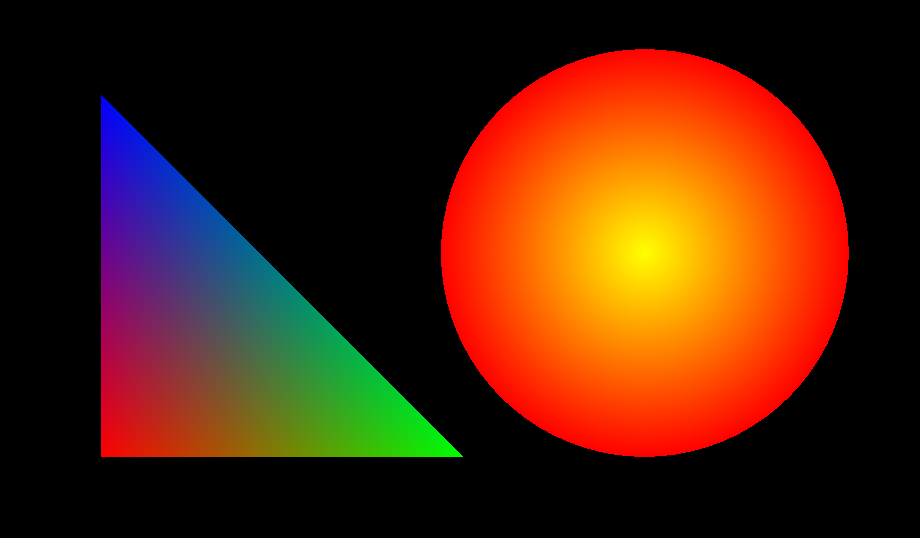
Keeping with the theme, today we’re going to be drawing more stupid shapes with OpenGL. Yay! But this time I’m going to introduce a new technique which turns out to be essential if you want to do much of anything beyond drawing plain monochromatic shapes. That technique is INTERPOLATION. It lets you do fancy stuff like this:
In-turr-poh-lay-shun
Interpolation is a long word. But the concept is pretty simple. It’s just an extra snooty way of talking about blending between values. In today’s example, we’ll be blending between different colors, but color is only one of many different properties that can be blended in OpenGL.
When you interpolate, you start at one value and you end at another. The rate at which you transition between them can be expressed by a function. And the simplest function for transitioning is known as linear interpolation. When you interpolate linearly, you go directly from A to B, in a straight line. There are plenty of other ways to interpolate that are useful in graphics, such as Hermite interpolation, and they tend to ease you to your destination in a slightly more roundabout fashion. But that’s a rabbit hole for another day. For now, we’ll stick to the basics. Linear interpolation. From A, straight to B.
Ctrl + N
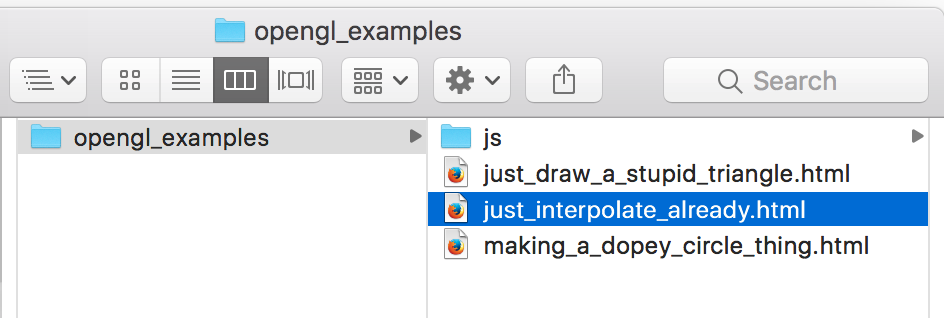
Just like before, we’re going to make a new file in the same folder with the last two. Call it just_interpolate_already.html.
All The Codes
As usual, I’m going to plop all the code down right here, and you can copy and paste it. Here we go!
<!DOCTYPE html>
<html lang="en">
  <head>
    <title>Making A Dopey Circle Thing With OpenGL</title>
    <meta charset="utf-8">
    <meta name="viewport" content="width=device-width, user-scalable=no, minimum-scale=1.0, maximum-scale=1.0">
    <style>
      body {
        color: #ffffff;
        background-color: #000000;
        margin: 0px;
        overflow: hidden;
      }
    </style>
  </head>
  <body>

    <div id="container"></div>

    <script src="js/three.js"></script>
    <script src="js/Detector.js"></script>

    <script>

      var webGlSupported = Detector.webgl;
      if (!webGlSupported) {
        Detector.addGetWebGLMessage();
      }

      var container = undefined;
      var camera = undefined;
      var scene = undefined;
      var renderer = undefined;

      initializeCamera();
      initializeScene();
      initializeRenderer();
      renderScene();

      function initializeCamera() {
        var aspectRatio = window.innerWidth / window.innerHeight;
        var screenWidth = undefined;
        var screenHeight = undefined;
        if (aspectRatio > 1.0) {
          screenWidth = 320.0 * aspectRatio;
          screenHeight = 320.0;
        } else {
          screenWidth = 320.0;
          screenHeight = 320.0 / aspectRatio;
        }

        var nearPlane = 1.0;
        var farPlane = 1000.0;
        camera = new THREE.OrthographicCamera(
          -0.5 * screenWidth,
          0.5 * screenWidth,
          0.5 * screenHeight,
          -0.5 * screenHeight,

          nearPlane,
          farPlane
        );

        var distanceFromScene = 500.0;
        camera.position.set(0.0, 0.0, distanceFromScene);
      }

      function initializeScene() {
        scene = new THREE.Scene();

        // 1
        var material = getMaterial();

        // 3
        var triangleGeometry = getTriangleGeometry();
        var triangleMesh = new THREE.Mesh(triangleGeometry, material);
        triangleMesh.position.set(-60.0, -45.0, 0.0);
        scene.add(triangleMesh);

        // 5
        var radius = 45.0;
        var sidesCount = 80;
        var circleGeometry = getRegularPolygonGeometry(radius, sidesCount);
        var circleMesh = new THREE.Mesh(circleGeometry, material);
        circleMesh.position.set(60.0, 0.0, 0.0);
        scene.add(circleMesh);
      }

      function getMaterial() {
        // 2
        return new THREE.MeshBasicMaterial({
          vertexColors: THREE.VertexColors,
          side: THREE.DoubleSide
        });
      }

      function getTriangleGeometry() {
        // 4
        var geometry = new THREE.Geometry();

        geometry.vertices.push(new THREE.Vector3(0.0, 0.0, 0.0));
        geometry.vertices.push(new THREE.Vector3(80.0, 0.0, 0.0));
        geometry.vertices.push(new THREE.Vector3(0.0, 80.0, 0.0));

        var red = new THREE.Color(1.0, 0.0, 0.0);
        var green = new THREE.Color(0.0, 1.0, 0.0);
        var blue = new THREE.Color(0.0, 0.0, 1.0);

        var vertexColors = [
          red,
          green,
          blue
        ];

        var normal = undefined;

        geometry.faces.push(new THREE.Face3(0, 1, 2, normal, vertexColors));

        return geometry;
      }

      function getRegularPolygonGeometry(radius, sidesCount) {
        var geometry = new THREE.Geometry();

        var centerPoint = new THREE.Vector3(0.0, 0.0, 0.0);
        geometry.vertices.push(centerPoint);

        for (var outerPointIndex = 0; outerPointIndex < sidesCount; outerPointIndex++) {
          var outerPointProgress = outerPointIndex / sidesCount;
          var angleInRadians = outerPointProgress * 2.0 * Math.PI;

          var x = Math.cos(angleInRadians) * radius;
          var y = Math.sin(angleInRadians) * radius;

          var outerPoint = new THREE.Vector3(x, y, 0.0);
          geometry.vertices.push(outerPoint);
        }

        // 6
        var red = new THREE.Color(1.0, 0.0, 0.0);
        var yellow = new THREE.Color(1.0, 1.0, 0.0);

        var vertexColors = [
          yellow,
          red,
          red
        ];

        var centerPointIndex = 0;

        for (faceIndex = 0; faceIndex < sidesCount; faceIndex++) {
          var face = new THREE.Face3();

          var trailingOuterPointIndex = faceIndex + 1;

          var leadingOuterPointIndex = faceIndex + 2;
          if (leadingOuterPointIndex > sidesCount) {
            leadingOuterPointIndex -= sidesCount;
          }

          // 7
          var normal = undefined;

          var face = new THREE.Face3(centerPointIndex, trailingOuterPointIndex, leadingOuterPointIndex, normal, vertexColors);

          geometry.faces.push(face);
        }

        return geometry;
      }

      function initializeRenderer() {
        renderer = new THREE.WebGLRenderer();
        renderer.setPixelRatio(window.devicePixelRatio);
        renderer.setSize(window.innerWidth, window.innerHeight);

        container = document.getElementById("container");
        container.appendChild(renderer.domElement);
      }

      function renderScene() {
        renderer.render(scene, camera);
      }

    </script>

  </body>
</html>
Where To Begin?
If you glance at the code, you’ll see that it’s largely the same. That’s good, because it means there’s less we have to go over. The HTML and the functions to configure the camera and the renderer haven’t changed at all. The only functions that have changed deal with setting up the scene, so that’s where we’ll begin. Find // 1 in initializeScene.
// 1
var material = getMaterial();
That brings us to // 2 already, which is right below in its own function.
function getMaterial() {
  // 2
  return new THREE.MeshBasicMaterial({
    vertexColors: THREE.VertexColors,
    side: THREE.DoubleSide
  });
}
In the previous tutorials, we created our Material object only after we’d created our Geometry objects. This time I’m making the Material first because I want to share it among multiple Meshes. Even though it’s only a few lines, I’ve moved the Material creation to its own function to avoid cluttering initializeScene any more than I have to.
The only difference between this Material and the Materials from the previous two tutorials has to do with the color property. This time around, I haven’t specified a color at all! Instead, I’m passing in this mysterious constant: THREE.VertexColors. This is telling three.js that it will need to use a different approach when it’s deciding which color to paint each pixel. We don’t want them all green or all magenta as we did before. Rather, OpenGL will have to look up extra information to determine each pixel’s color, and we’ll store that extra information in our shapes’ vertices.
Make The Shapes
After we return our Material to initializeScene, we find ourselves at part // 3.
// 3
var triangleGeometry = getTriangleGeometry();
var triangleMesh = new THREE.Mesh(triangleGeometry, material);
triangleMesh.position.set(-60.0, -45.0, 0.0);
scene.add(triangleMesh);
The first line in // 3 calls getTriangleGeometry, which is where you’ll find // 4.
function getTriangleGeometry() {
  // 4
  var geometry = new THREE.Geometry();

  geometry.vertices.push(new THREE.Vector3(0.0, 0.0, 0.0));
  geometry.vertices.push(new THREE.Vector3(80.0, 0.0, 0.0));
  geometry.vertices.push(new THREE.Vector3(0.0, 80.0, 0.0));

  var red = new THREE.Color(1.0, 0.0, 0.0);
  var green = new THREE.Color(0.0, 1.0, 0.0);
  var blue = new THREE.Color(0.0, 0.0, 1.0);

  var vertexColors = [
    red,
    green,
    blue
  ];

  var normal = undefined;

  geometry.faces.push(new THREE.Face3(0, 1, 2, normal, vertexColors));

  return geometry;
}
What we’re doing here should all seem somewhat familiar to you by now. We’re creating a Geometry, pairing it with a Material to create a Mesh, and then positioning that Mesh and adding it to the Scene. The only lines that won’t be familiar begin when we create the red color object. It looks like we’re defining three colors, throwing them into an array, and then passing that array into the Face3 that we created. But why?

Remember how I said we were going to store the colors that OpenGL would look up in our shapes’ vertices? In three.js, this is how you configure such an arrangement. You build a parallel array containing three Color objects, which correspond to the three vertex indices that form the triangle. Then you pass that array into the constructor for the Face3. The signature for the constructor actually looks like this:
Face3(indexA, indexB, indexC, normal, vertexColors)
The three indices are required arguments, and in the previous tutorials they’re all that we bothered to provide. normal and vertexColors, however, are optional arguments. We can provide them if we want to, or we can leave them blank to use the default values. How do we leave them blank? Well, we can do what we did in the previous tutorials and simply not list them when we call the function. Or–we can do what I’m doing here with the normal variable.
var normal = undefined;
I need to pass the vertexColors array in as the fifth argument… but I can’t specify the fifth argument without passing in something for the fourth. By passing in undefined, I’m signaling that I want to use the default value for normal.
You might be wondering why the normal argument is even there. In an earlier tutorial I mentioned that three.js tries to avoid drawing triangles that aren’t facing the camera as an optimization. Since we didn’t want to worry about our triangles getting optimized away, we gave our Material the THREE.DoubleSide property so that it would draw both sides of each polygon. But if we hadn’t done this, we’d have to specify a normal vector to indicate which side of each triangle was the front.
Fiat Triangulum
That’s all the code we needed to run to assemble our terrific tricolored triangle. As you can clearly see, the colors blend smoothly into one another. But let’s do some inspection to make sure we understand precisely what’s going on here.
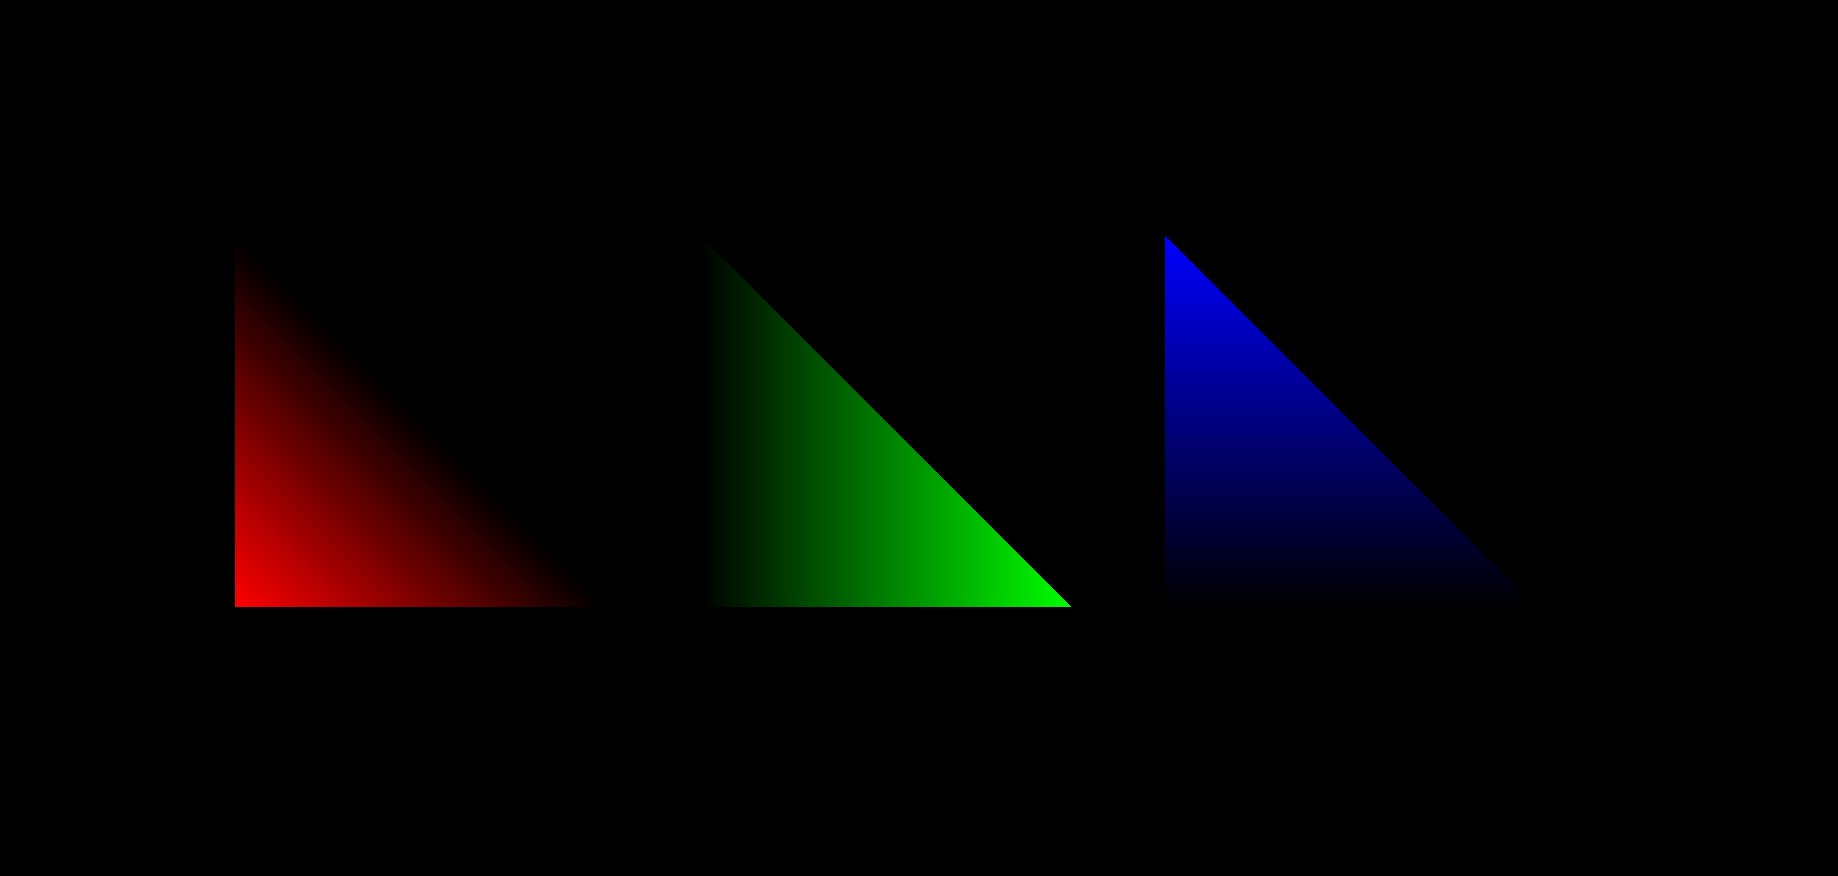
It helps me to think of our triangle as three separate triangles layered additively on top of each other. Here’s an image I made that shows filtered versions of our tricolored triangle. The first shows only the red channel, the second only green, and the third only blue.
It also helps to examine the actual color values that our program has produced. In the diagram below, I’ve marked a few points with the color you’d find if you used the eyedropper tool in your favorite paint program.
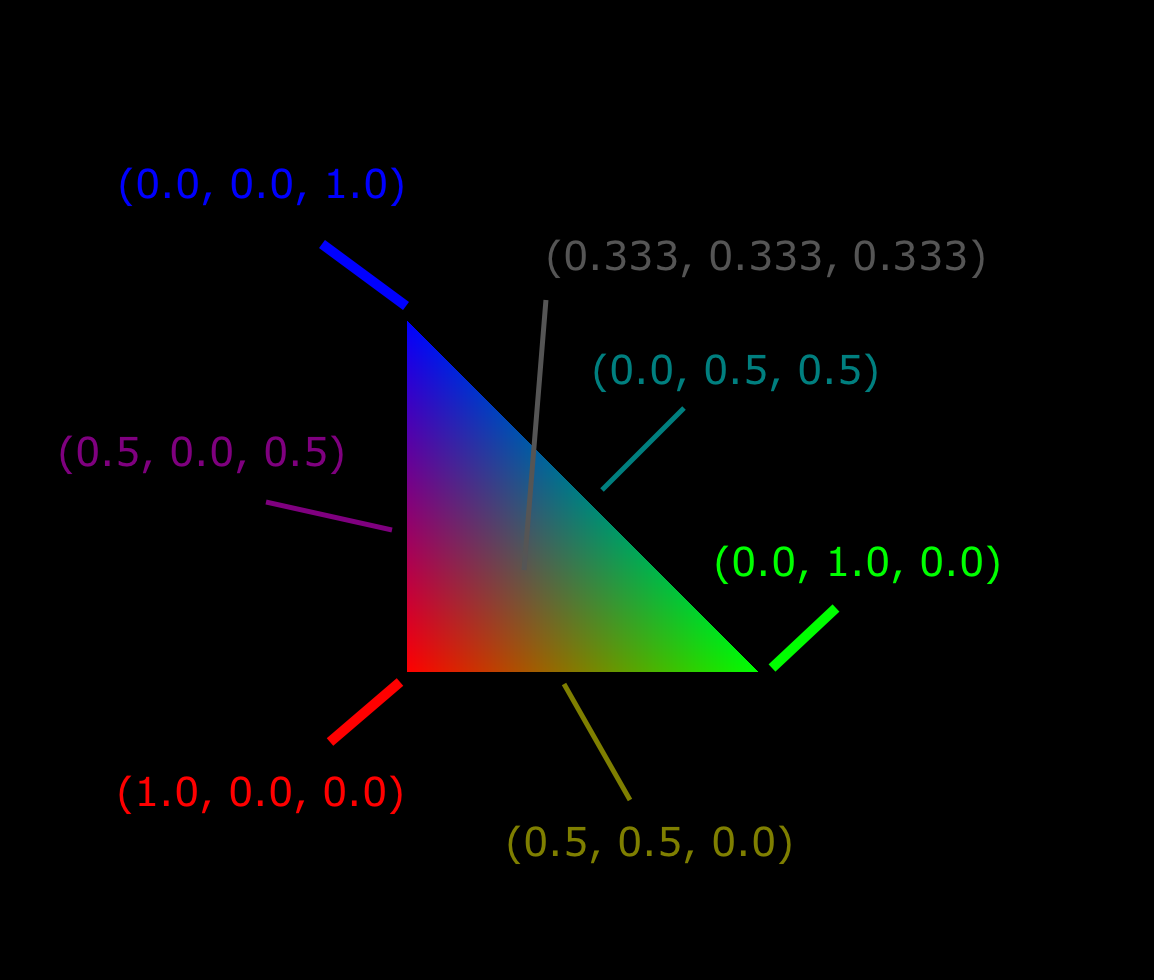
Do you see what’s going on here? We have the three corners, each of which contains an undiluted color value. But as you move farther from each corner, that color channel’s value decreases. And since we’re using linear interpolation, it decreases at a constant rate. So when you’re halfway across the triangle, the color channel will be at 50% intensity. If you stopped one quarter of the way across a side, it would be at 75% intensity. And upon reaching either of the two other corners, the channel’s value drops to 0.0. There’s a point at the center (the centroid, I believe) of the triangle that is two thirds of the possible distance away from each of its vertices. That’s why its color value is (0.333, 0.333, 0.333).
Kind of cool, huh? I hope that solidified your understanding of interpolation a bit. Armed with this knowledge, let’s venture forth and draw a stupid gradient circle thing!
Stupid Gradient Circle Thing
Back to the code! We left off at part // 5.
// 5
var radius = 45.0;
var sidesCount = 80;
var circleGeometry = getRegularPolygonGeometry(radius, sidesCount);
var circleMesh = new THREE.Mesh(circleGeometry, material);
circleMesh.position.set(60.0, 0.0, 0.0);
scene.add(circleMesh);
But this part isn’t really any different from what we did in the last tutorial. We’re adding a circle (technically an 80-sided polygon) to the scene at a position slightly to the right of the origin. We don’t actually hit any fresh code until part // 6, which happens after we’ve built our vertices’ locations in the call to getRegularPolygonGeometry.
// 6
var red = new THREE.Color(1.0, 0.0, 0.0);
var yellow = new THREE.Color(1.0, 1.0, 0.0);

var vertexColors = [
  yellow,
  red,
  red
];
It’s pretty similar to the way we built the vertexColors array for our tricolored triangle. Except this time there are only two colors. And we’re repeating red for the second and third vertices. Bastante interesante.
Part // 7 is also new since the last tutorial, but it’s no different from what we did for the tricolored triangle.
// 7
var normal = undefined;

var face = new THREE.Face3(centerPointIndex, trailingOuterPointIndex, leadingOuterPointIndex, normal, vertexColors);

geometry.faces.push(face);
Radical Radial Gradient
That’s it! The rest of the code is all stuff we’ve seen before. When you drop it in your browser and run it, you should get the radiant orb that we teased towards the top of this page. Be careful when you pick it up–I wouldn’t want you to burn your fingers.
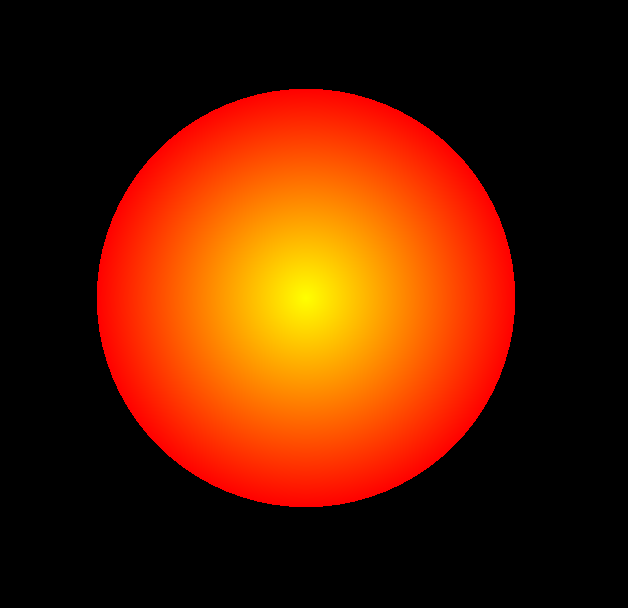
Can you tell how we achieved this effect? Our circle is made up of 80 super-skinny triangles. And they all have their pointy ends at the origin. The pointy vertex has a color value of (1.0, 1.0, 0.0) assigned to it–that’s bright yellow. As we move outward to the opposite side of each triangle (that is, towards the outer perimeter of our circle) we’re interpolating the color value all the way down to (1.0, 0.0, 0.0)–bright red. So basically we’re draining the green channel from 1.0 at the center all the way to 0.0 around the edge.
I’d encourage you to play around with this code a little, just to see what happens when you tweak certain parameters. Try switching which color goes with which indices. Or passing in new colors altogether. Increase or decrease the sidesCount so you can see the resulting patterns more clearly. Interpolation is a lot more entertaining than it sounds.
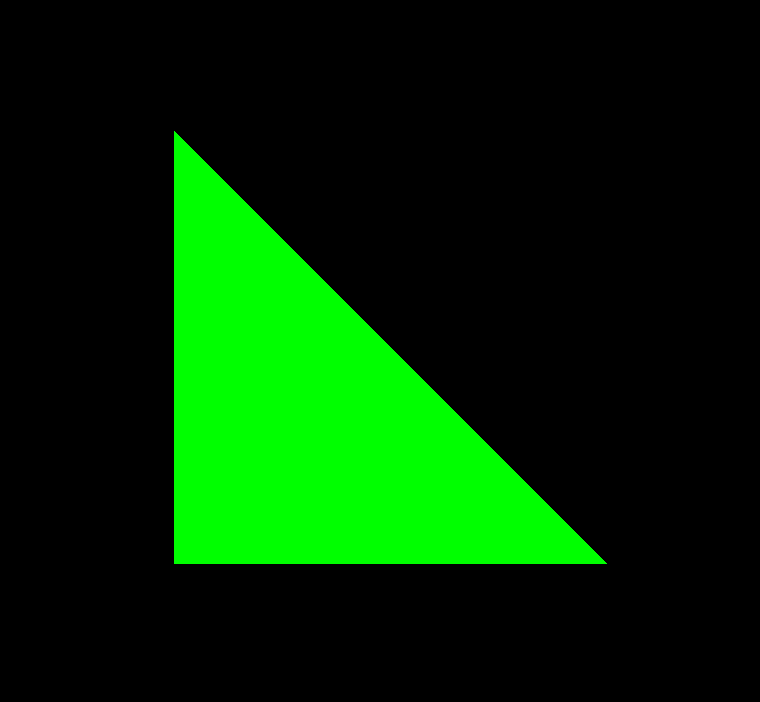
I Think You’re Getting The Hang Of This
Now that you’ve had a chance to tinker with OpenGL a bit, I’ll bet the core concepts–coordinate systems, plotting triangles, interpolation–are starting to feel a lot less alien. We still haven’t built anything particularly visually dazzling. Sorry, Green Triangle. But we’ve just covered two major new concepts, and we’re about to see just how versatile they can be.
Two? We talked about interpolation, but what was the second thing? I hinted at it at the beginning, and I was super sneaky, so you probably didn’t even notice you learned it. Over the course of this very tutorial, we’ve unlocked the ability to store extra information in vertices. This time around we stored a color in each vertex. I wonder what else we could keep in there… and how that might prove useful. Guess you’ll have to keep reading to find out.
Teh Downloadablez
Click here to run the finished product!
And here’s a link to a downloadable version of the source code: making_a_dopey_circle_thing.html. Note that you’ll need to run it from inside the folder structure that we set up in the first tutorial.