Just Draw A Stupid Triangle With OpenGL
Hi, Internet Friends. Sorry it’s been a while since my last post. I’ve been trying to keep this thing updated, but I’ve been pretty thoroughly buried in work for the game. The good news is that we’re making great progress on the gameplay, and we have lots of fun new mechanics for you to try out. You should join the beta!
How Does OpenGL Work? Try it.
Anyway, I thought I’d switch things up and write a super simple technical tutorial. I’d like to continue in the spirit of my previous post, What Even Is An OpenGL?, but this time I’d like to jump in and use OpenGL to draw something. It’s uh… nothing particularly fancy. But it’s the best place for OpenGL beginners to start.
Today we’re going to draw a triangle. BEHOLD!
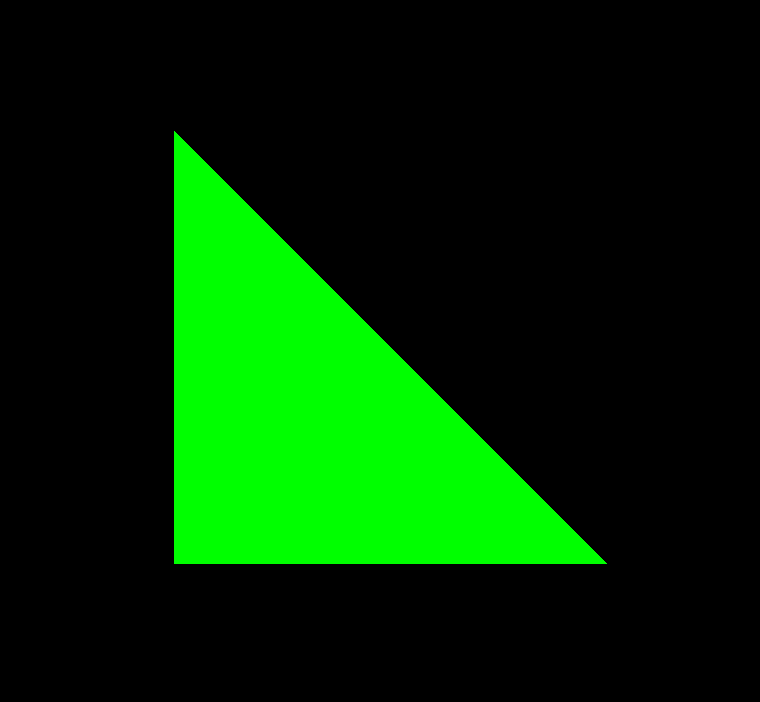
Yes, try to contain your excitement! You too can harness the awesome power of your computer’s modern graphics system draw your very own triangle. I’ll make it easy. Just follow along!
Prerequisites
I’m going to try not to assume much about your experience level as a programmer. Hopefully even people who haven’t written much code at all will have a good idea of what’s going on.
One thing you will need is a good text editor. I highly recommend GitHub’s Atom. In fact, I’m typing in it right now. It’s totally free, but at this point it’s easily more effective than any editor I’ve ever paid money for.
Once you’ve got your editor of choice open, head on over to threejs.org and download the latest version of the three.js library. As of this writing, that’s R87, but hopefully new releases won’t break anything.
Why three.js?
I’m a 2D mobile game developer, so you might be wondering why I’m having you download a library for drawing 3D graphics on the web. Well, honestly I’d prefer to show you with a full-featured 2D game engine on a real mobile device, but getting set up to write an entire iOS or Android app is a ton of extra work. Three.js is relatively easy to install, and you can run your code from any device with even a slightly modern web browser, so you can get started way faster.
In my last article I described the separations between the different layers in a 2D game’s architecture. You’ll recall that the game engine is the layer that provides a convenient interface between the game logic and OpenGL itself, so you don’t have to make direct calls to OpenGL in your game’s code. In the case of this tutorial, you can think of three.js as our game engine. Under that analogy the code we’re about to write–to set up the triangle and add it to the scene–would be considered the game logic.
Three.js is also open source. That’s always cool.
Where To Put Stuff
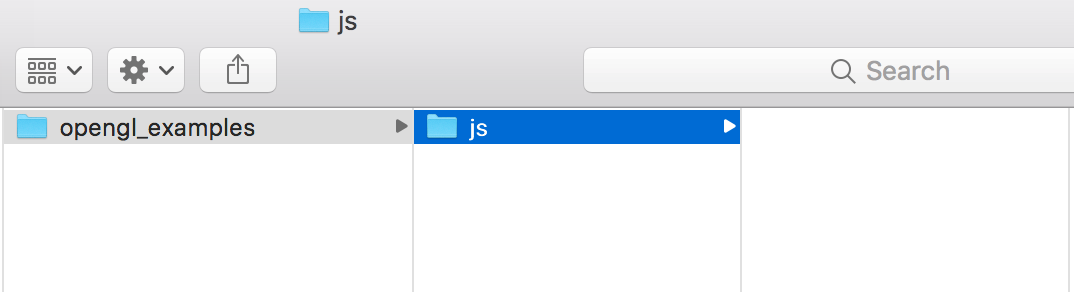
Okay. Once you’ve downloaded three.js, go ahead and make a new folder somewhere on your computer for us to work in. Let’s call it opengl_examples. Then create a new subfolder in there that we’ll just call js. Your folder structure should look like this:
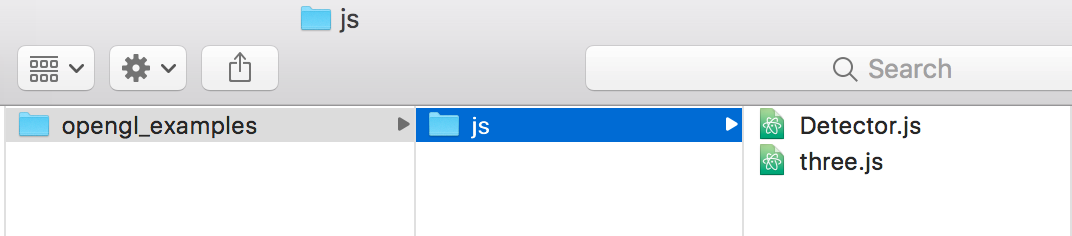
For our next act, we’ll open the three.js folder that we just unzipped, and we’ll copy two files into that new js folder. The first one is at build/three.js, and the second one is way down at examples/js/Detector.js. Here’s how your folder structure will look after you’ve copied them in:
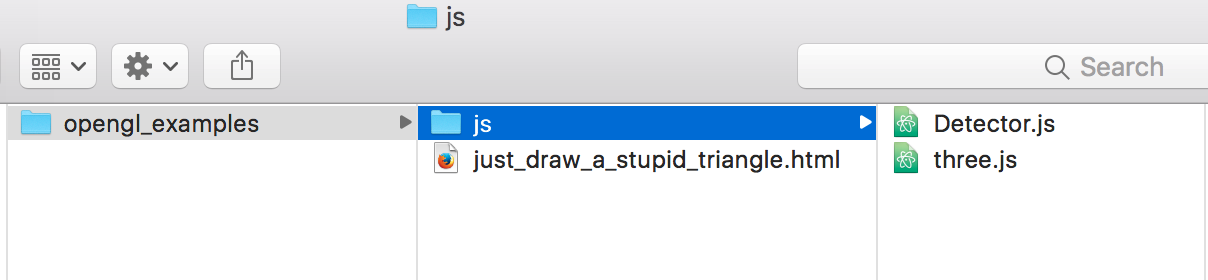
Finally, let’s start editing a new file in the opengl_examples folder called just_draw_a_stupid_triangle.html. So it’ll look like this now:
What’s With The Attitude?
If you’re sensing some derision in the title I’ve chosen, it’s because I always find the process of setting up OpenGL to be unbearably tedious. For this tutorial we’re relying on three.js (and our browser’s WebGL implementation) to do almost all of the work for us. We don’t have to trouble ourselves with any of the low-level minutiae associated with talking to OpenGL directly. Three.js paves right over all those pitfalls for us. And I think it does a pretty good job. Even so, there are still so many little things that inevitably go wrong. It’s always something. The coordinate system is backwards, or the camera is facing the wrong direction, or the polygons are inside-out. I’ll have you know that when I was setting up this tutorial on my own, it took me a few hours of fiddling just to get anything to show up on the screen. So you’d better appreciate all the time I sacrificed for you! 😜

Sorry. I’m just grumpy because configuring a scene to display something for the first time is always the least fun part of working with OpenGL. The good news is that once it’s done, it’s done. For any future examples, we can just copy the setup that we made for this one.
Let’s Write Something Already
Yes. Let’s.
In that new just_draw_a_stupid_triangle.html file you opened, copy/paste all this code:
<!DOCTYPE html>
<html lang="en">
  <head>
    <title>Just Draw A Stupid Triangle With OpenGL</title>
    <meta charset="utf-8">
    <meta name="viewport" content="width=device-width, user-scalable=no, minimum-scale=1.0, maximum-scale=1.0">
    <style>
      body {
        color: #ffffff;
        background-color: #000000;
        margin: 0px;
        overflow: hidden;
      }
    </style>
  </head>
  <body>

    <div id="container"></div>

    <script src="js/three.js"></script>
    <script src="js/Detector.js"></script>

    <script>

      // DRAW YOUR TRIANGLE HERE.

    </script>

  </body>
</html>
If you’ve ever written a webpage before, you’ll recognize that all we’re doing here is setting up an empty HTML document. But a few lines in the body stand out. This one is just creating a div for us to fill in with our OpenGL view later.
<div id="container"></div>
And these are loading up the two JavaScript files that I had you copy in earlier. It’s the three.js library itself, and another utility that I’ll explain in a bit. If you put your .js files somewhere different from where I did then you’ll need to adjust these paths, or else your web browser won’t be able to find the three.js library.
<script src="js/three.js"></script>
<script src="js/Detector.js"></script>
Oh, JavaScript…

I’ll admit that JavaScript isn’t my favorite language to work with. But as languages go it’s pretty straightforward, and it’ll run in any web browser. So I’ll deal with it. We’re about to begin the interesting part of this tutorial.
Between those two <script> tags, where it says // DRAW YOUR TRIANGLE HERE., go ahead and copy in the following program:
var webGlSupported = Detector.webgl;
if (!webGlSupported) {
  Detector.addGetWebGLMessage();
}

var container = undefined;
var camera = undefined;
var scene = undefined;
var renderer = undefined;

initializeScene();
initializeRenderer();
renderScene();

function initializeScene() {
  // ...
}

function initializeRenderer() {
  // ...
}

function renderScene() {
  // ...
}
Right. So what are we doing here? Let’s start at the top.
var webGlSupported = Detector.webgl;
if (!webGlSupported) {
  Detector.addGetWebGLMessage();
}
This little bit is just to safeguard us in case somebody opens our .html file in a browser that doesn’t support the WebGL standard. At this point, pretty much all major browsers do, so you’d have to have a fairly ancient computer. But somebody always does.
In languages with C-style syntax (like JavaScript), the ! means not. So we’re just declaring a variable webGlSupported that will hold true if the browser supports WebGL, or false if it doesn’t. Then, if WebGL is not supported, we have the Detector utility show an alert message that just tells the user to update their computer already.
Okay, moving on.
var container = undefined;
var camera = undefined;
var scene = undefined;
var renderer = undefined;
These four lines are declaring some global variables that we’ll need to access later. I’m initializing them to undefined for now to make it abundantly clear that they’re not supposed to have anything in them yet.
initializeScene();
initializeRenderer();
renderScene();

function initializeScene() {
  // ...
}

function initializeRenderer() {
  // ...
}

function renderScene() {
  // ...
}
…And here we’re calling three functions, which we then go on to define. Except that the bodies of all three functions are blank for now. So if you open the .html file right now, it won’t do anything. You should just have an empty screen. Here’s a screenshot of my browser:
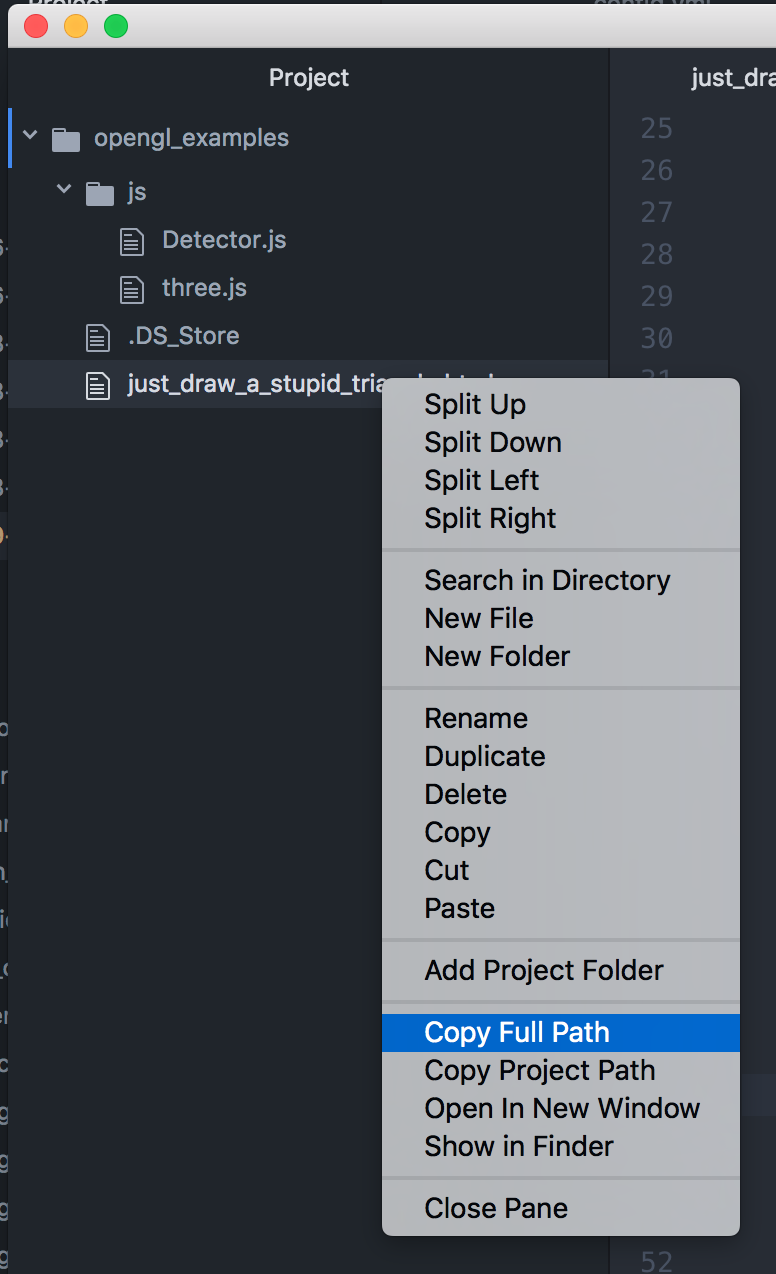
If you’re wondering if there’s a convenient way to open the file you’re working on in your browser, Atom has a handy feature for that. Just find the file in the tree pane on the left, right-click it, and select Copy Full Path. Then you can paste it straight into your browser’s URL box.
Another neat trick if you have your file manager open is to drag and drop your HTML file straight into your browser window. It should open it right up.
Filling In That First Function
When you get tired of staring at that empty screen, it’s time to fill it in with something. Let’s get to it.
Fill in the body of the first function, initializeScene, with this code:
// 1
scene = new THREE.Scene();

// 2
var aspectRatio = window.innerWidth / window.innerHeight;
var screenWidth = undefined;
var screenHeight = undefined;
if (aspectRatio > 1.0) {
  screenWidth = 320.0 * aspectRatio;
  screenHeight = 320.0;
} else {
  screenWidth = 320.0;
  screenHeight = 320.0 / aspectRatio;
}

// 3
var nearPlane = 1.0;
var farPlane = 1000.0;
camera = new THREE.OrthographicCamera(
  -0.5 * screenWidth,
  0.5 * screenWidth,
  0.5 * screenHeight,
  -0.5 * screenHeight,

  nearPlane,
  farPlane
);

var distanceFromScene = 500.0;
camera.position.set(0.0, 0.0, distanceFromScene);

// 4
var geometry = new THREE.Geometry();
geometry.vertices.push(new THREE.Vector3(0.0, 0.0, 0.0));
geometry.vertices.push(new THREE.Vector3(0.0, 80.0, 0.0));
geometry.vertices.push(new THREE.Vector3(80.0, 0.0, 0.0));
geometry.faces.push(new THREE.Face3(0, 1, 2));

// 5
var green = new THREE.Color(0.0, 1.0, 0.0);

var material = new THREE.MeshBasicMaterial({
  color: green,
  side: THREE.DoubleSide
});

// 6
var mesh = new THREE.Mesh(geometry, material);
mesh.position.set(0.0, 0.0, 0.0);
scene.add(mesh);
Whew. There’s a lot there, but I’ll go over it piece by piece.
1 - Creating A Scene Object
// 1 shows how you create a scene in three.js. Most 2D game engines also have their own scene concepts. It’s usually one self-contained screen for the game–like the title screen or the level screen or the options screen. We’re storing our scene in the global variable we declared earlier so that we can access it from other functions.
2 - Aspect Ratios And Coordinate Scales
In // 2 we’re setting up the coordinate system for our scene. For as long as humans have been watching things on screens, we’ve been talking about aspect ratios. The aspectRatio is just a term for the width of a screen divided by its height. So a screen that’s wider than it is tall (like a typical computer monitor) will have an aspect ratio greater than 1.0. If it’s taller than it is wide (like an iPhone), then it’ll be less than 1.0. In this case, we’re talking about your browser window’s aspect ratio. So basically what we’re doing is trying to inscribe a square area at the center of the your rectangular browser window to draw in. We’re figuring out whether your window is tall or if it’s wide. And in either case, we take the lesser dimension, and we say that it’ll be 320.0 units across. The greater dimension will end up being some value greater than 320.0, but we’re only really going to draw in the 320.0 units around its center.

Why did I pick 320.0? It’s just an arbitrary scale factor that makes the numbers easier to work with. Actually, it’s the width of the original iPhone’s screen in pixels, so a lot of 2D game engines still base their coordinate systems on it. If I felt like it, I could leave the values between 0.0 and 1.0, but it’s generally harder for humans to think about numbers that small.
3 - Setting Up A Projection
// 3 is where we set up our scene’s camera. Three.js gives us a handy Camera object for simplicity, but the purpose of that Camera is really to create a projection. A projection is just a fancy graphics term for a way to show a 3D world on a 2D screen. So we’re setting up a region of 3D space in which things that we’ll need to render should be placed. It might seem odd that a 2D scene (or 2D game) still requires us to set up a projection in 3D space. But behind the scenes, this is really how all OpenGL games work–even the 2D ones.
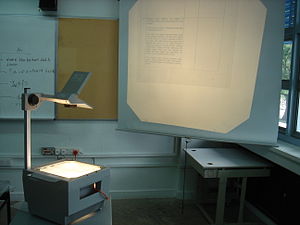
You’ll notice that we’re using an OrthographicCamera, as opposed to a PerspectiveCamera. If we were rendering a 3D scene, we’d want to configure aspects of our perspective, like how wide the angle on our camera’s lens would be. But since we’re trying to set up a 2D scene, we’re not worried about any of that. You can think of our 2D scene as a bunch of paper cutouts sitting flat on a tabletop. We’re holding the camera directly above the table, pointing at the center of the scene. But the camera has a magical orthographic lens, which just means that it doesn’t matter how far away you hold the camera–you’ll still see the same amount of the scene. The boundaries will stay fixed.
The first four arguments in the OrthographicCamera’s constructor represent the boundaries of the scene. For this demo, I’m setting up the coordinate system so that (0.0, 0.0) is in the center. (160.0, 160.0) is the upper-right corner of the square, and (-160.0, -160.0) is the bottom-left. I like this setup because it reminds me of a Euclidean plane from geometry class… but OpenGL doesn’t actually care. It would also work fine with (0.0, 0.0) at the top-right if that’s what you told it to do.
Finally, you have the nearPlane, farPlane, and distanceFromScene. We don’t have to worry too much about these because we’re using that magical OrthographicCamera. So I just chose some values that seem to work.
4 - Plotting Three Points
By // 4, we’re ready to start defining our triangle’s geometry. Three.js likes you to do this with a Geometry object. Seems sensible enough. The three values that you pass into a THREE.Vector3 are the x, y, and z coordinates of a point in space. We’re working in 2D, and that’s why all the z values are 0.0.
Once we’ve added all three points to the triangle’s Geometry, we also define a Face3 with the indices of those three points (0, 1, and 2). But why does the Face3 have to have exactly three points? Why not allow a face to have any number of points? The answer may be a little surprising if you’ve never worked with graphics before. Are you ready to know the truth?
Everything in every OpenGL game you’ve ever played is made up of triangles. 😮 In fact, it’s probably safe to extend that assertion to just about every image displayed by every modern graphics system. At first, this seems counterintuitive. Wouldn’t rectangles be a better choice to base your graphics system on? After all, every standard image format from bitmaps to .jpegs defines rectangular images. The reason why triangles win is that all other polygons can be broken up into triangles. Think about it–a rectangle is really just two triangles put together. If you optimize your graphics system for drawing triangles really fast, you can draw any other polygon fast as well. You just have to break it up into triangles first.
In this tutorial, we’re trying to keep things simple. That’s why I chose a triangle–we don’t have to break it up at all. In three.js, we define each triangle with its own Face3 object. We have just one triangle in our shape, so we have just one Face3. But if we wanted to draw a more complex shape, we’d have to define more Face3s.
Instead of passing in the points themselves, we define Face3s with the indices of the three points that make it up. That’s so that we could easily repeat points without specifying their coordinates again if they were used more than once.
5 - Materials
Three.js uses a materials system to designate how each triangle should be shaded in. This is a pretty popular design, but it’s far from the only way to communicate triangles’ properties to OpenGL. If you were writing your own engine, you’d have to come up with your own system. Writing a flexible, reusable system would entail an insane amount of work, so let’s be glad that’s already handled for us.
For our example we’re going to have a bright green triangle, so naturally we define that color and pass it into our material’s constructor. Three.js lets us define colors using three values between 0.0 and 1.0: red, green, and blue. So in our case red will be 0.0, green will be 1.0, and blue will be 0.0. We could also specify colors using hexadecimal codes like you might in old-school HTML or in Photoshop. In that format, we’d use #00FF00 to get bright green. But in my opinion hex codes are much harder for humans to read and manipulate than plain decimal numbers. Pick whichever format works best for you and your workflow–it’s a matter of preference and convenience.

But what’s this THREE.DoubleSide business all about? You know how we have a camera floating in 3D space, even though we’re trying to render a 2D scene? Well–if we were rendering a 3D scene, we’d have a lot of other nonsense to think about. When you’re looking at a complex 3D model made up of lots of little triangles, drawing all of them can be a very performance-intensive task. So if we were writing a 3D game, we could speed up our performance by defining a “front side” for each triangle and drawing only those triangles that are facing the camera.
However, we’re not writing a 3D game. We’re drawing just one triangle, and performance isn’t even a factor. The DoubleSide property just tells three.js not to try to optimize our triangle away. We always want to draw it, regardless of which direction it’s facing. To achieve this, three.js actually has to render both sides of the triangle. But there’s an important principle to follow anytime you’re writing code: don’t go out of your way to optimize for performance unless you hit a performance bottleneck. We’re not even remotely close to that.
6 - Making A Mesh
Part // 6 is pretty simple. We’re creating a THREE.Mesh object, which is just three.js’s way of pairing the Geometry we defined with the Material settings we defined. Once we’ve created the object, we position it at the origin, which should be the center of our screen. Then we add it to our scene. Adding elements to the scene is another pretty ubiquitous concept among 2D game engines. Each time your scene renders, it iterates through all the elements that have been added to it, and it renders them in order.
That’s it for our scene. It’s all set up, and we’ve added a big, green triangle in the middle.
So We’re Done, Right?
If you tried to open the file in your browser again, you might be dismayed to see that it’s still an empty black screen. We must have forgotten something. Let’s scroll back up to the top of the script to see what’s actually getting executed. That’s right–we created three functions, and they’re all getting called, but we’ve only finished filling in the first of them (initializeScene). The other two (initializeRenderer and renderScene) are still empty. Let’s fix that. Copy the following code into the body of initializeRenderer.
// 7
renderer = new THREE.WebGLRenderer();
renderer.setPixelRatio(window.devicePixelRatio);
renderer.setSize(window.innerWidth, window.innerHeight);

// 8
container = document.getElementById("container");
container.appendChild(renderer.domElement);
7 - Rendererer
Part // 7 sets up the THREE.WebGLRenderer, which is the object that three.js uses to configure your web browser to render your scene. We’re just passing in information about your device’s pixel density and the size of the area that it will need to use as a canvas. Once that’s ready, we’ll be able to pass the scene we’ve just built to the renderer, and if all goes according to plan, it’ll draw us a pretty green triangle.
8 - The Last Of The Paperwork

I promise we’re almost there.
So far we’ve used the name container for two things. The first was an empty div in the HTML, and the second was a global variable. In step // 8, we’re finding the container div in the webpage and storing a reference to it in the container variable. Then we use that reference to add three.js’s renderer view into the page.
Of course if you open the page again now, that view is still empty. 🤔
Last Step
Yes–just one more line of code. Our scene is set up. Our renderer is set up. Now all we have to do is tell the renderer to render the scene. Fill in the body of renderScene with this line:
renderer.render(scene, camera);
Save it, and try it in your browser again. If you did everything correctly, you’ll be rewarded with a brilliant green triangle. Congrats!
Only The Beginning
It may seem like a lot of work just to draw one measly triangle, but along the way we’ve covered some of the foundations of OpenGL in 2D games. In upcoming tutorials, we’ll build on these foundations and learn techniques to render graphics that are genuinely impressive. Stay tuned!
Update: here’s the next tutorial! Making A Dopey Circle Thing With OpenGL
Downloadables
Click here to run the finished product!
And here’s a link to a downloadable version of the source code: just_draw_a_stupid_triangle.html.